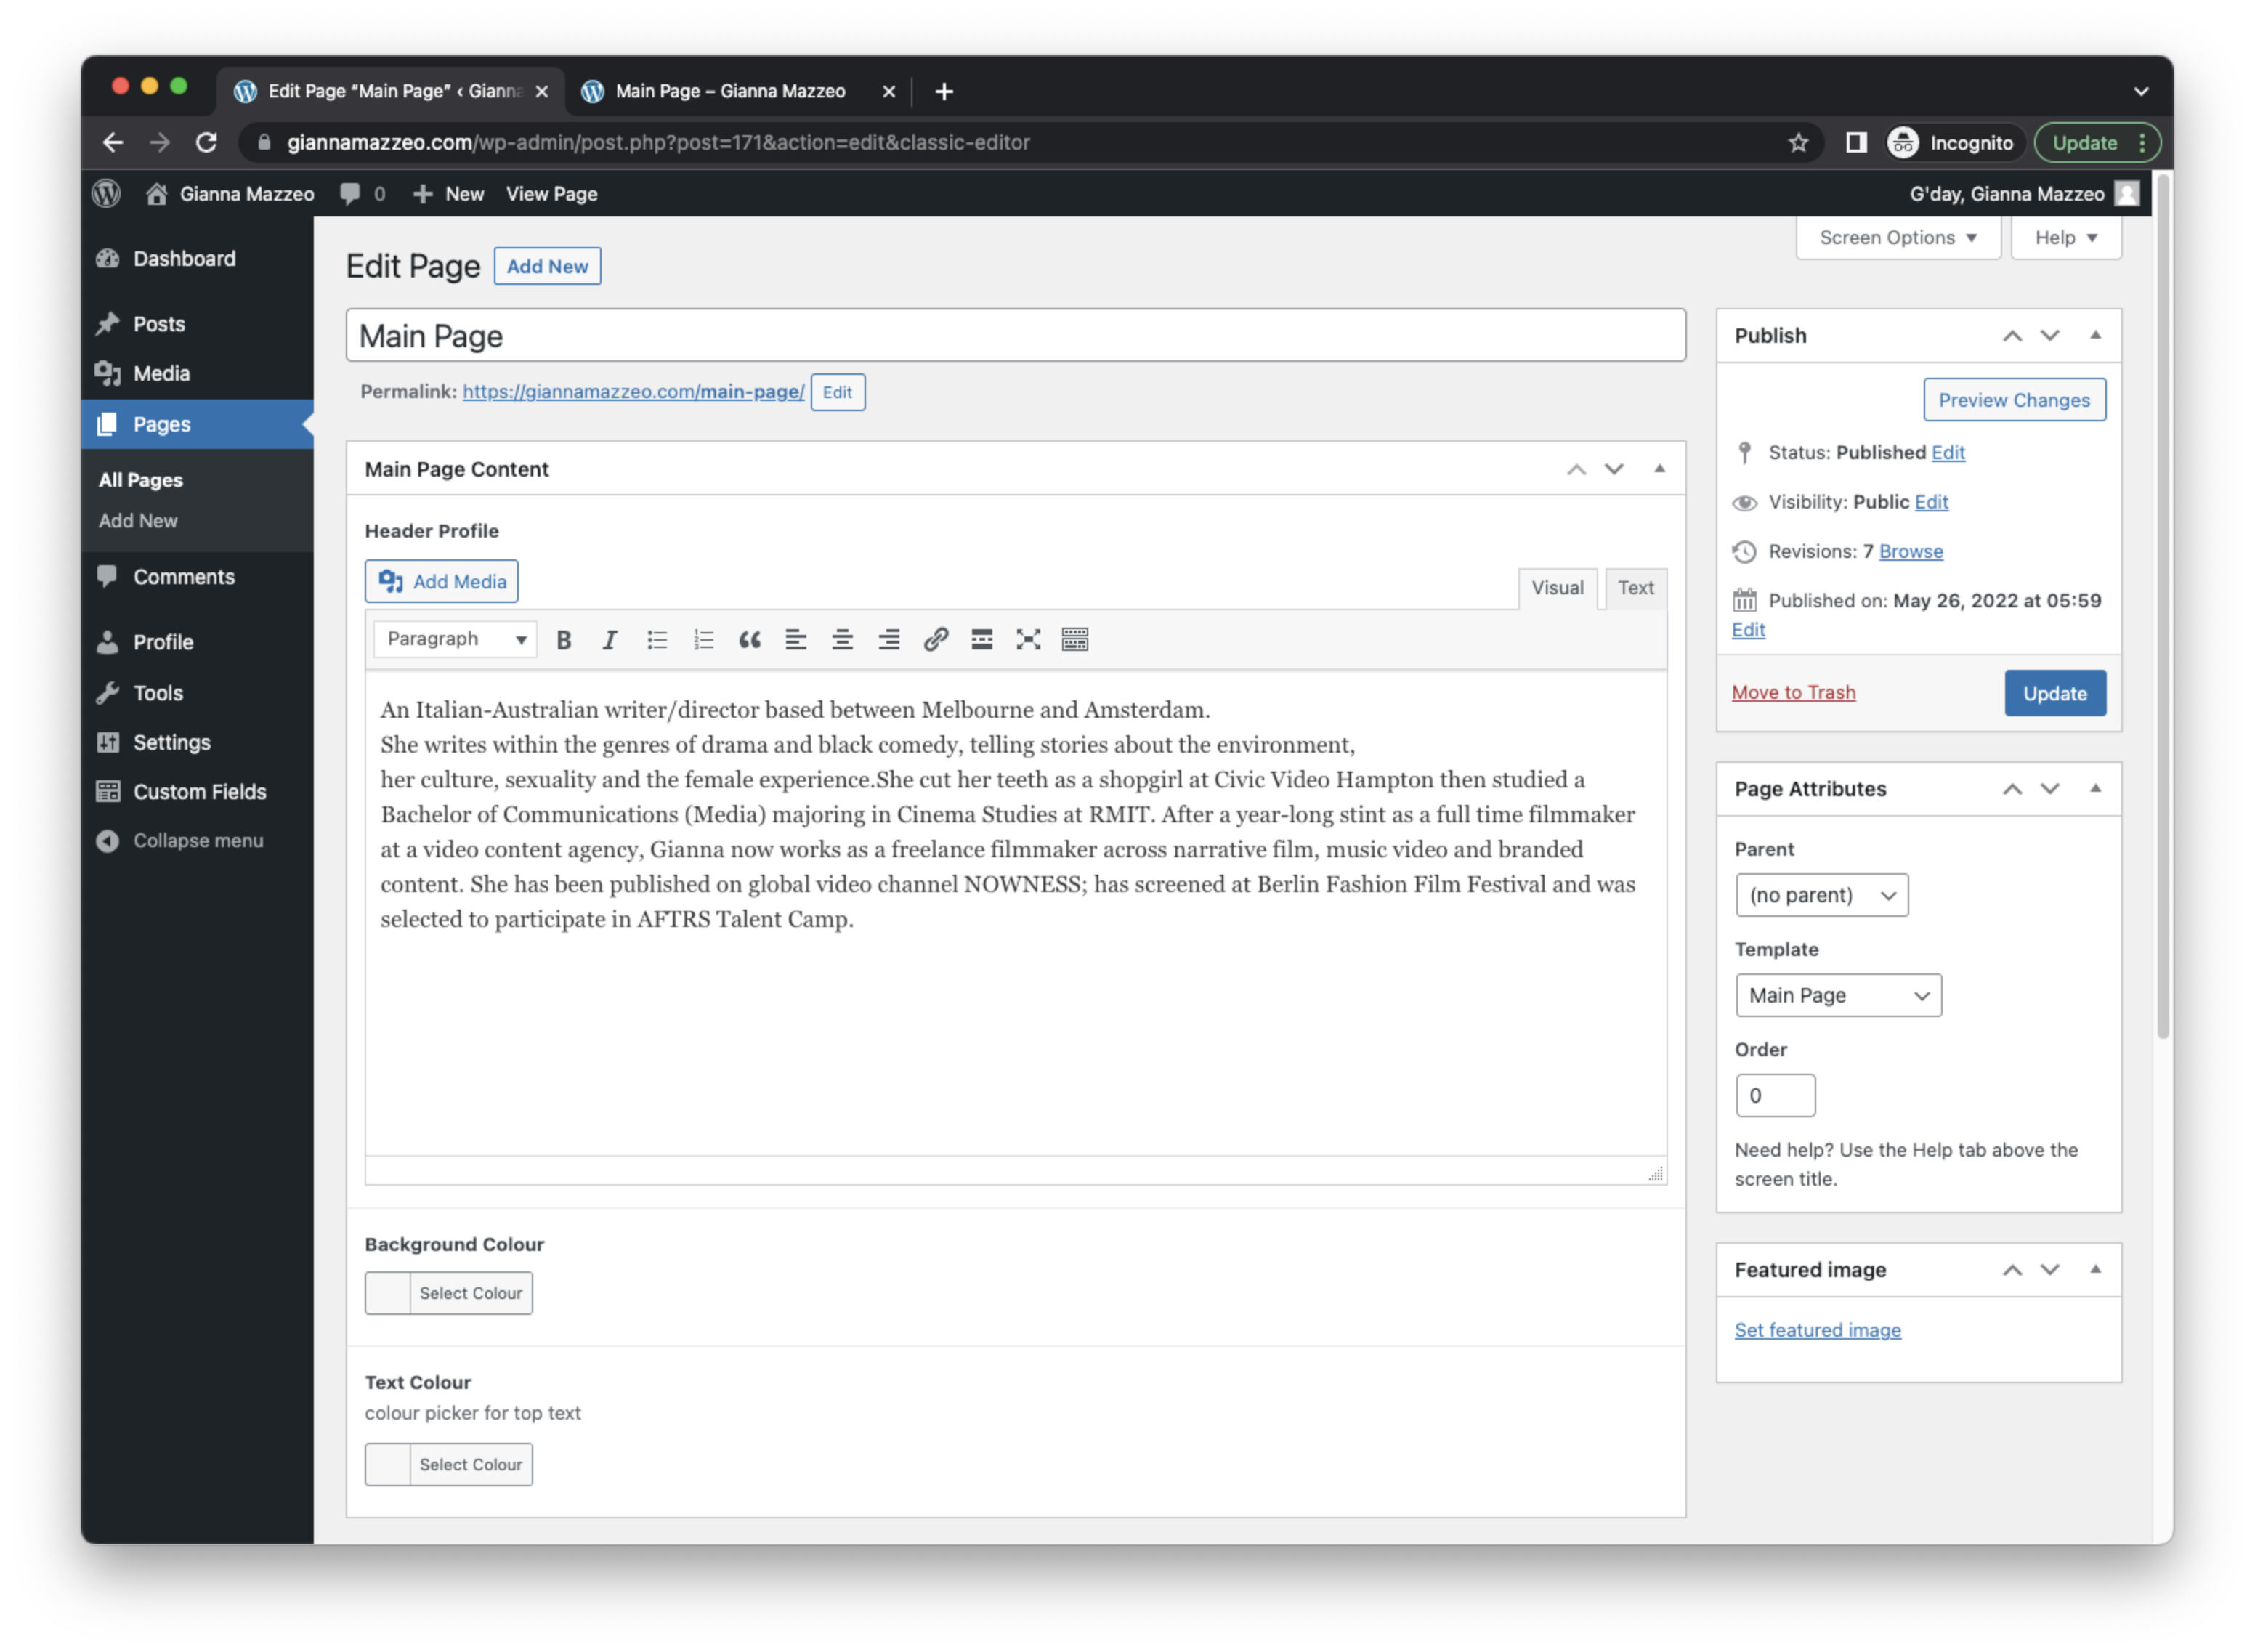
Header Profile – this is where you can update the header text on front and archive pages
Background colour selection for front page
text colour for front page
once done, scroll up and click UPDATE
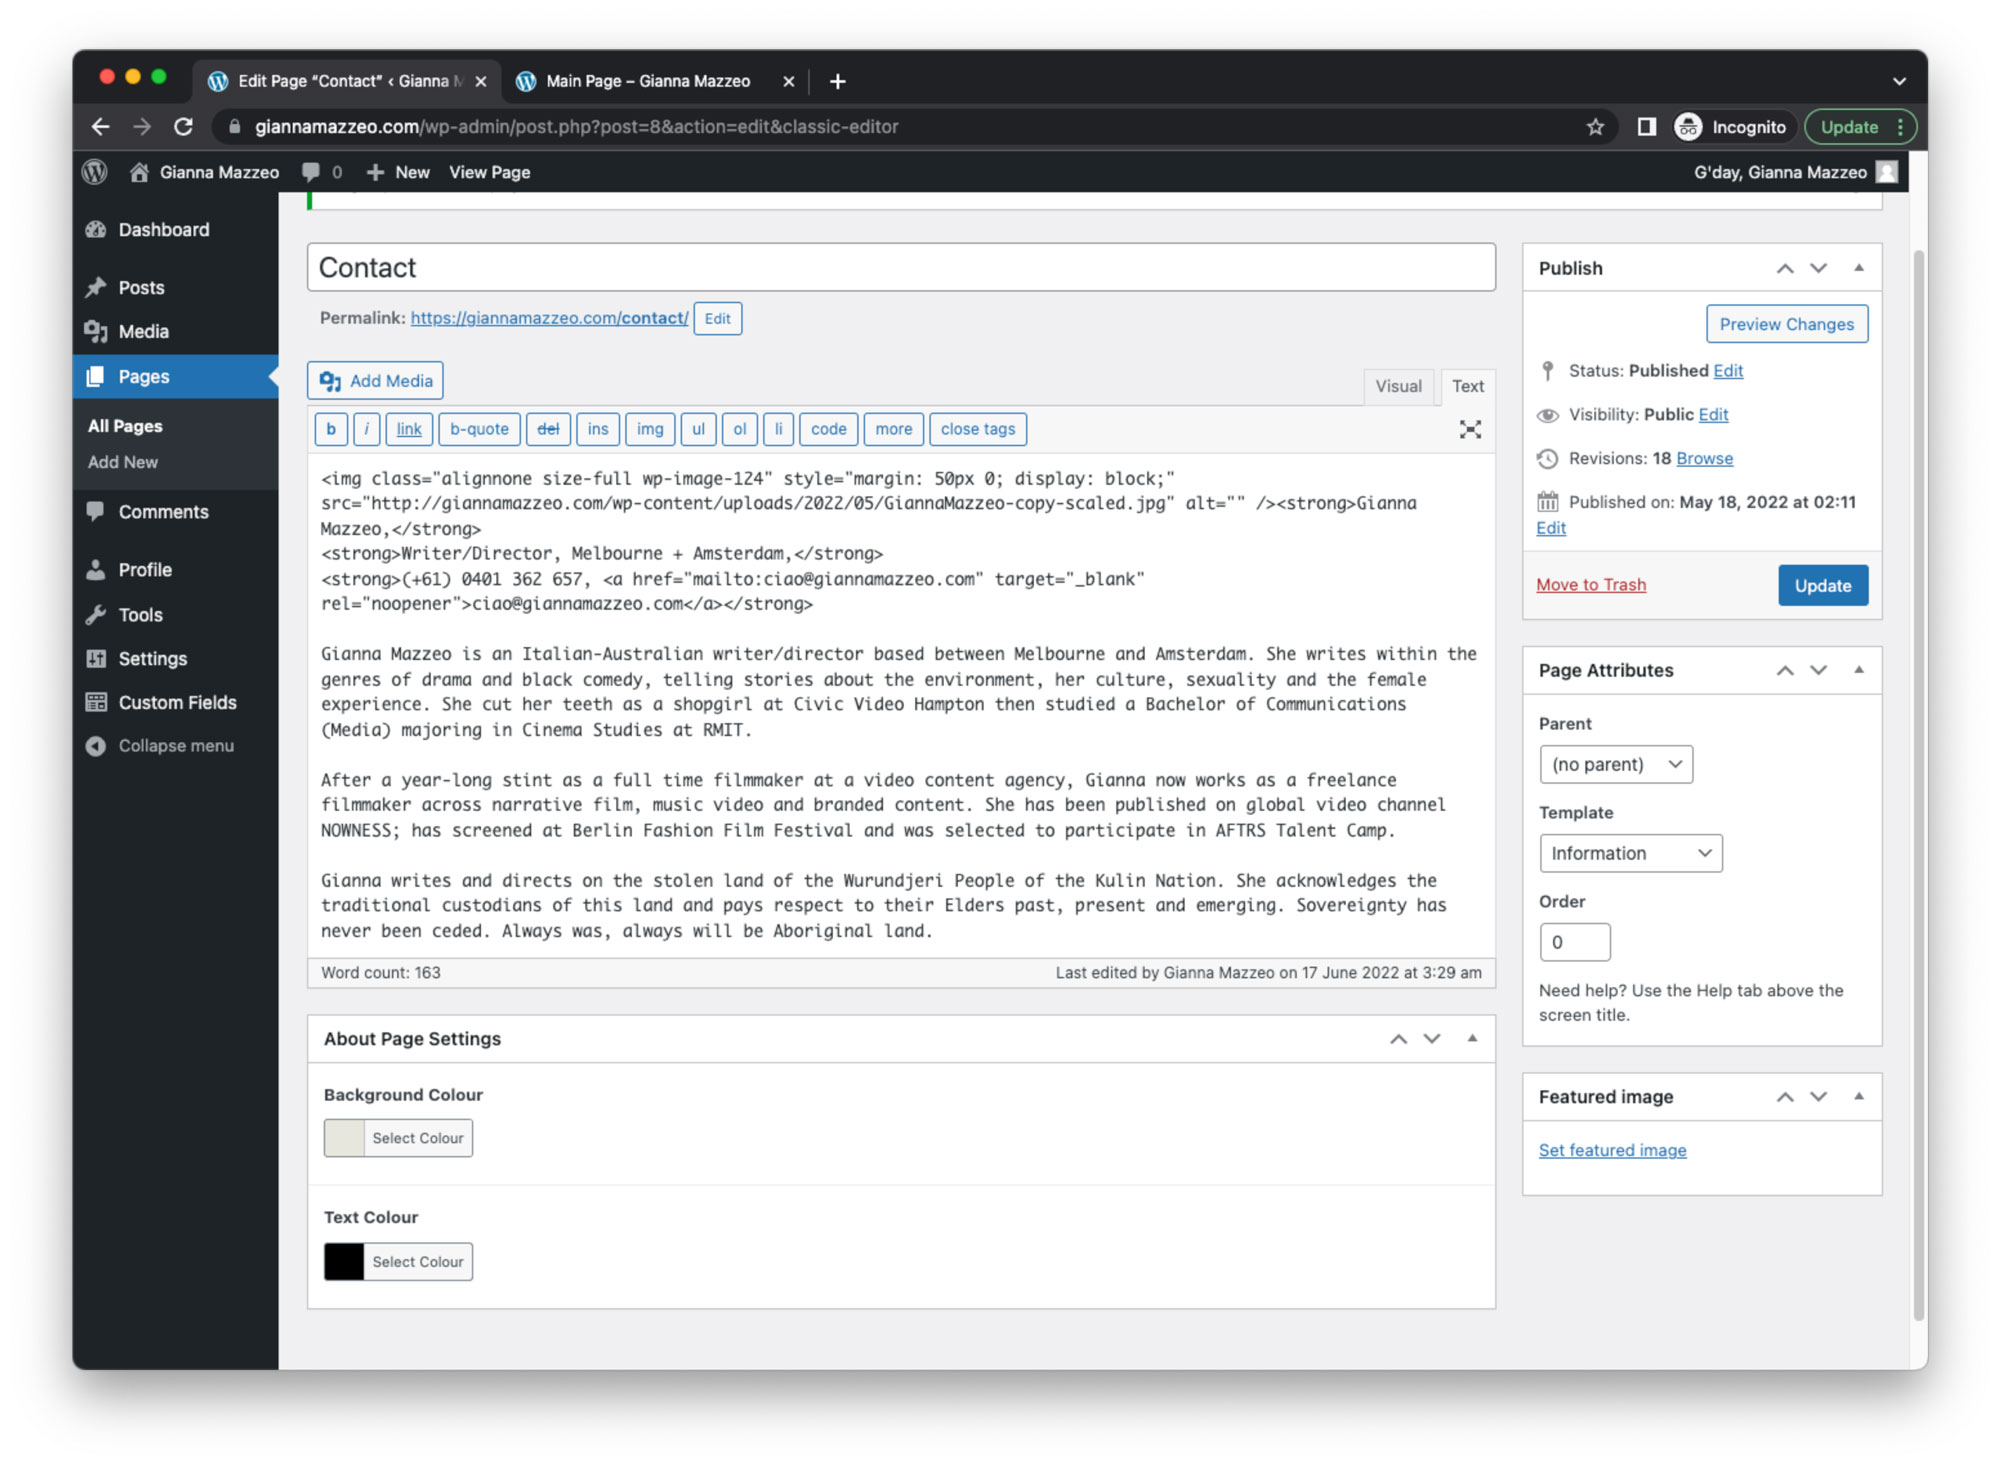
EDITING CONTACT / ABOUT DETAILS
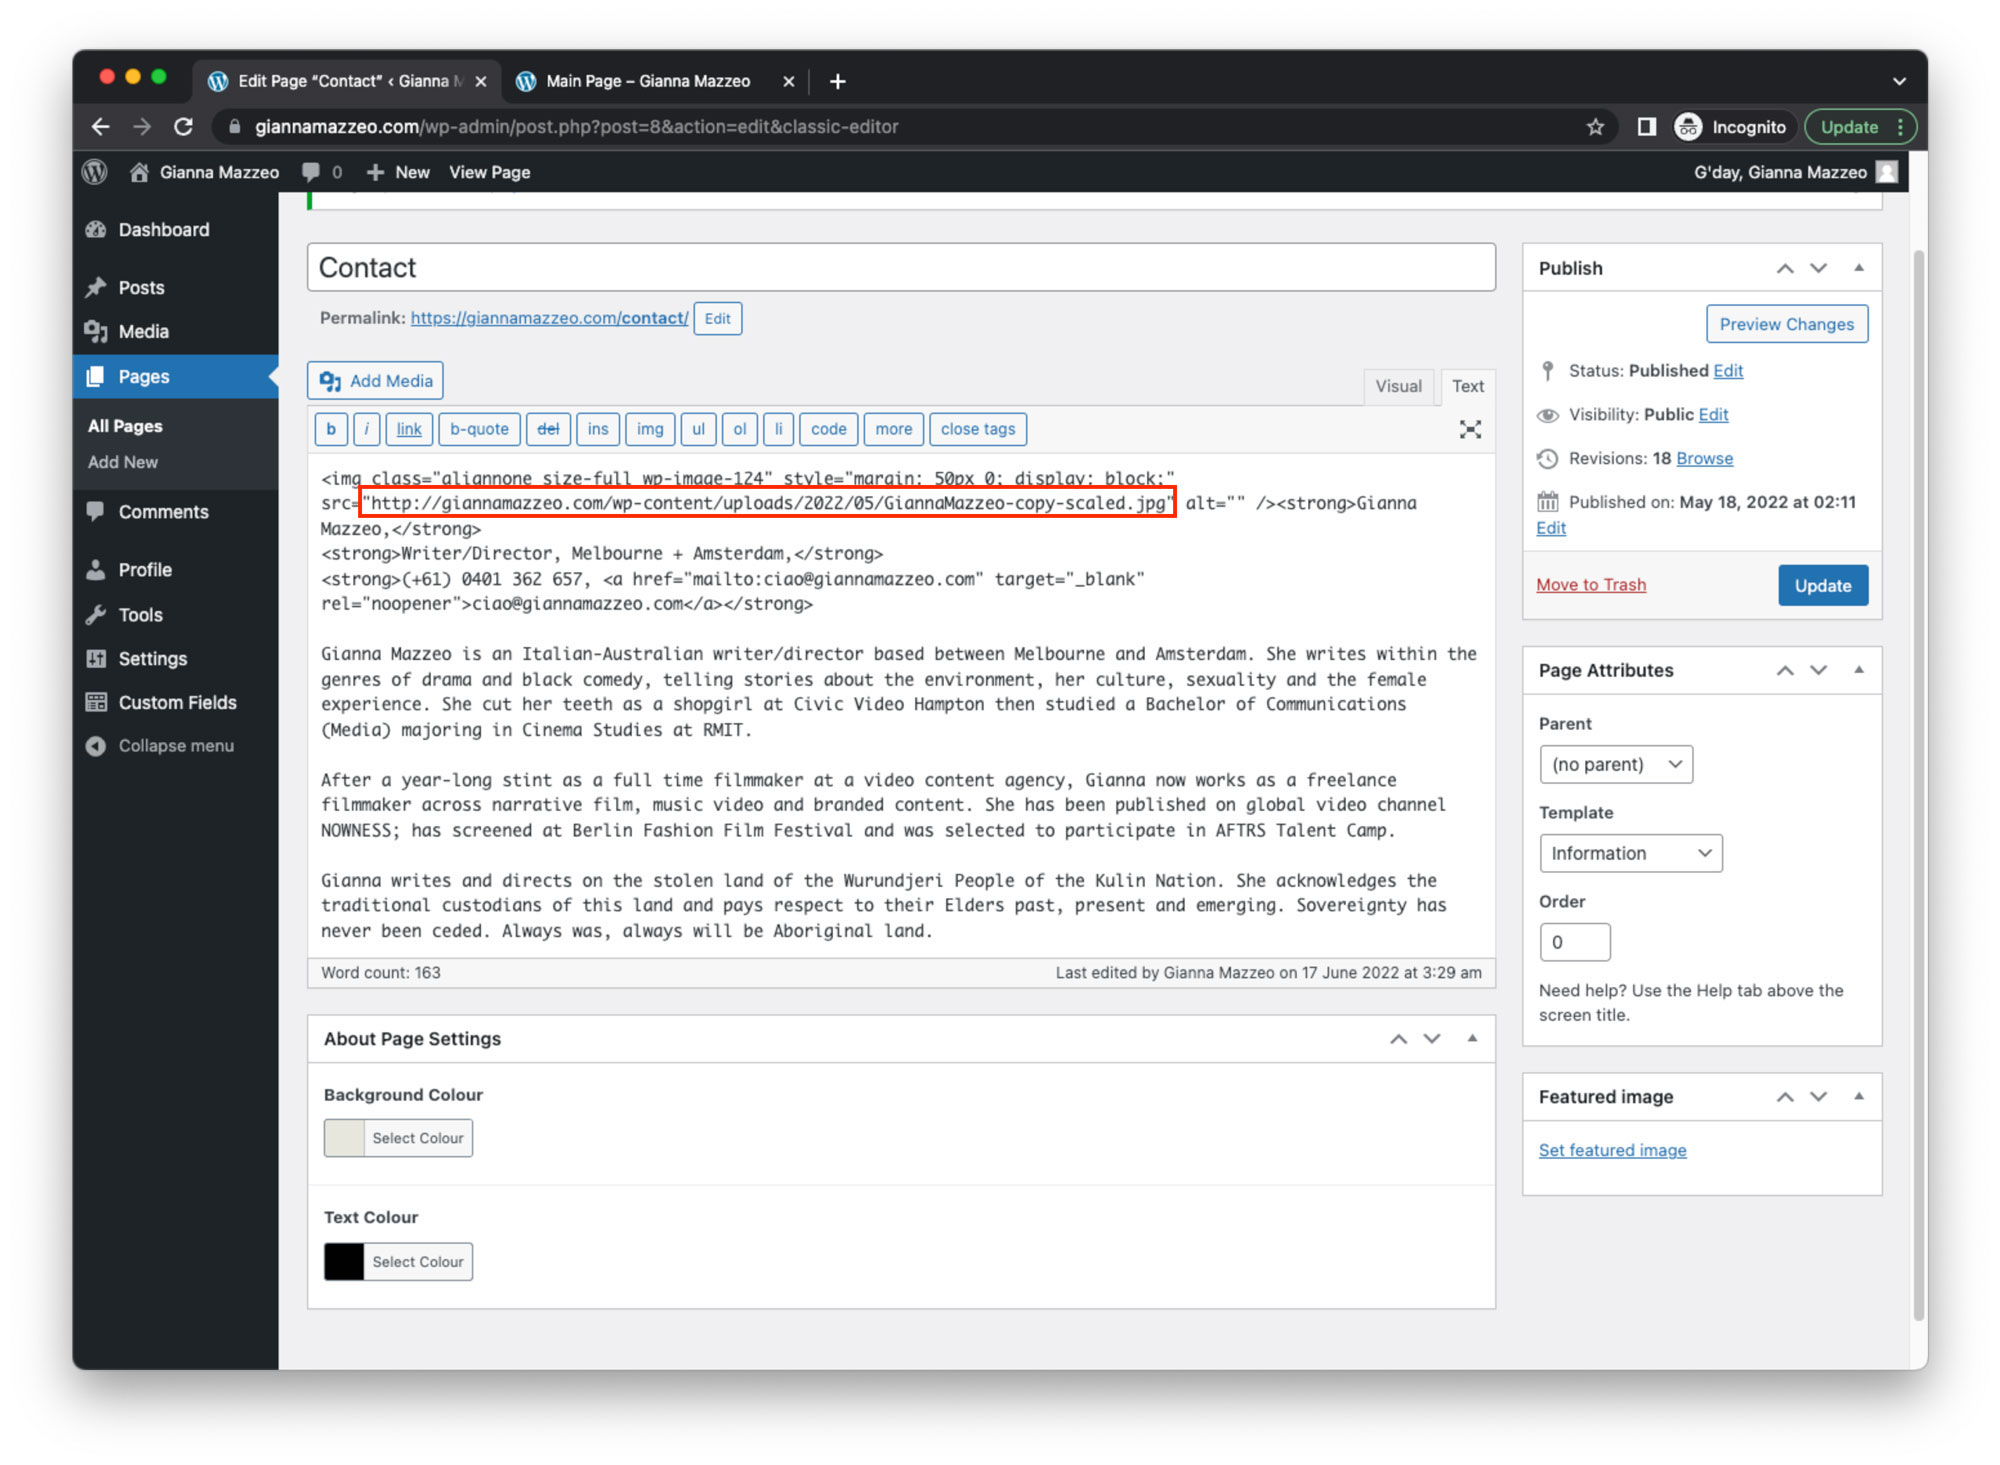
the contact details are typed in the Contact / About PAGE.
Navigate to Pages > Contact > Edit.
this is where you add the image, and a bit about you
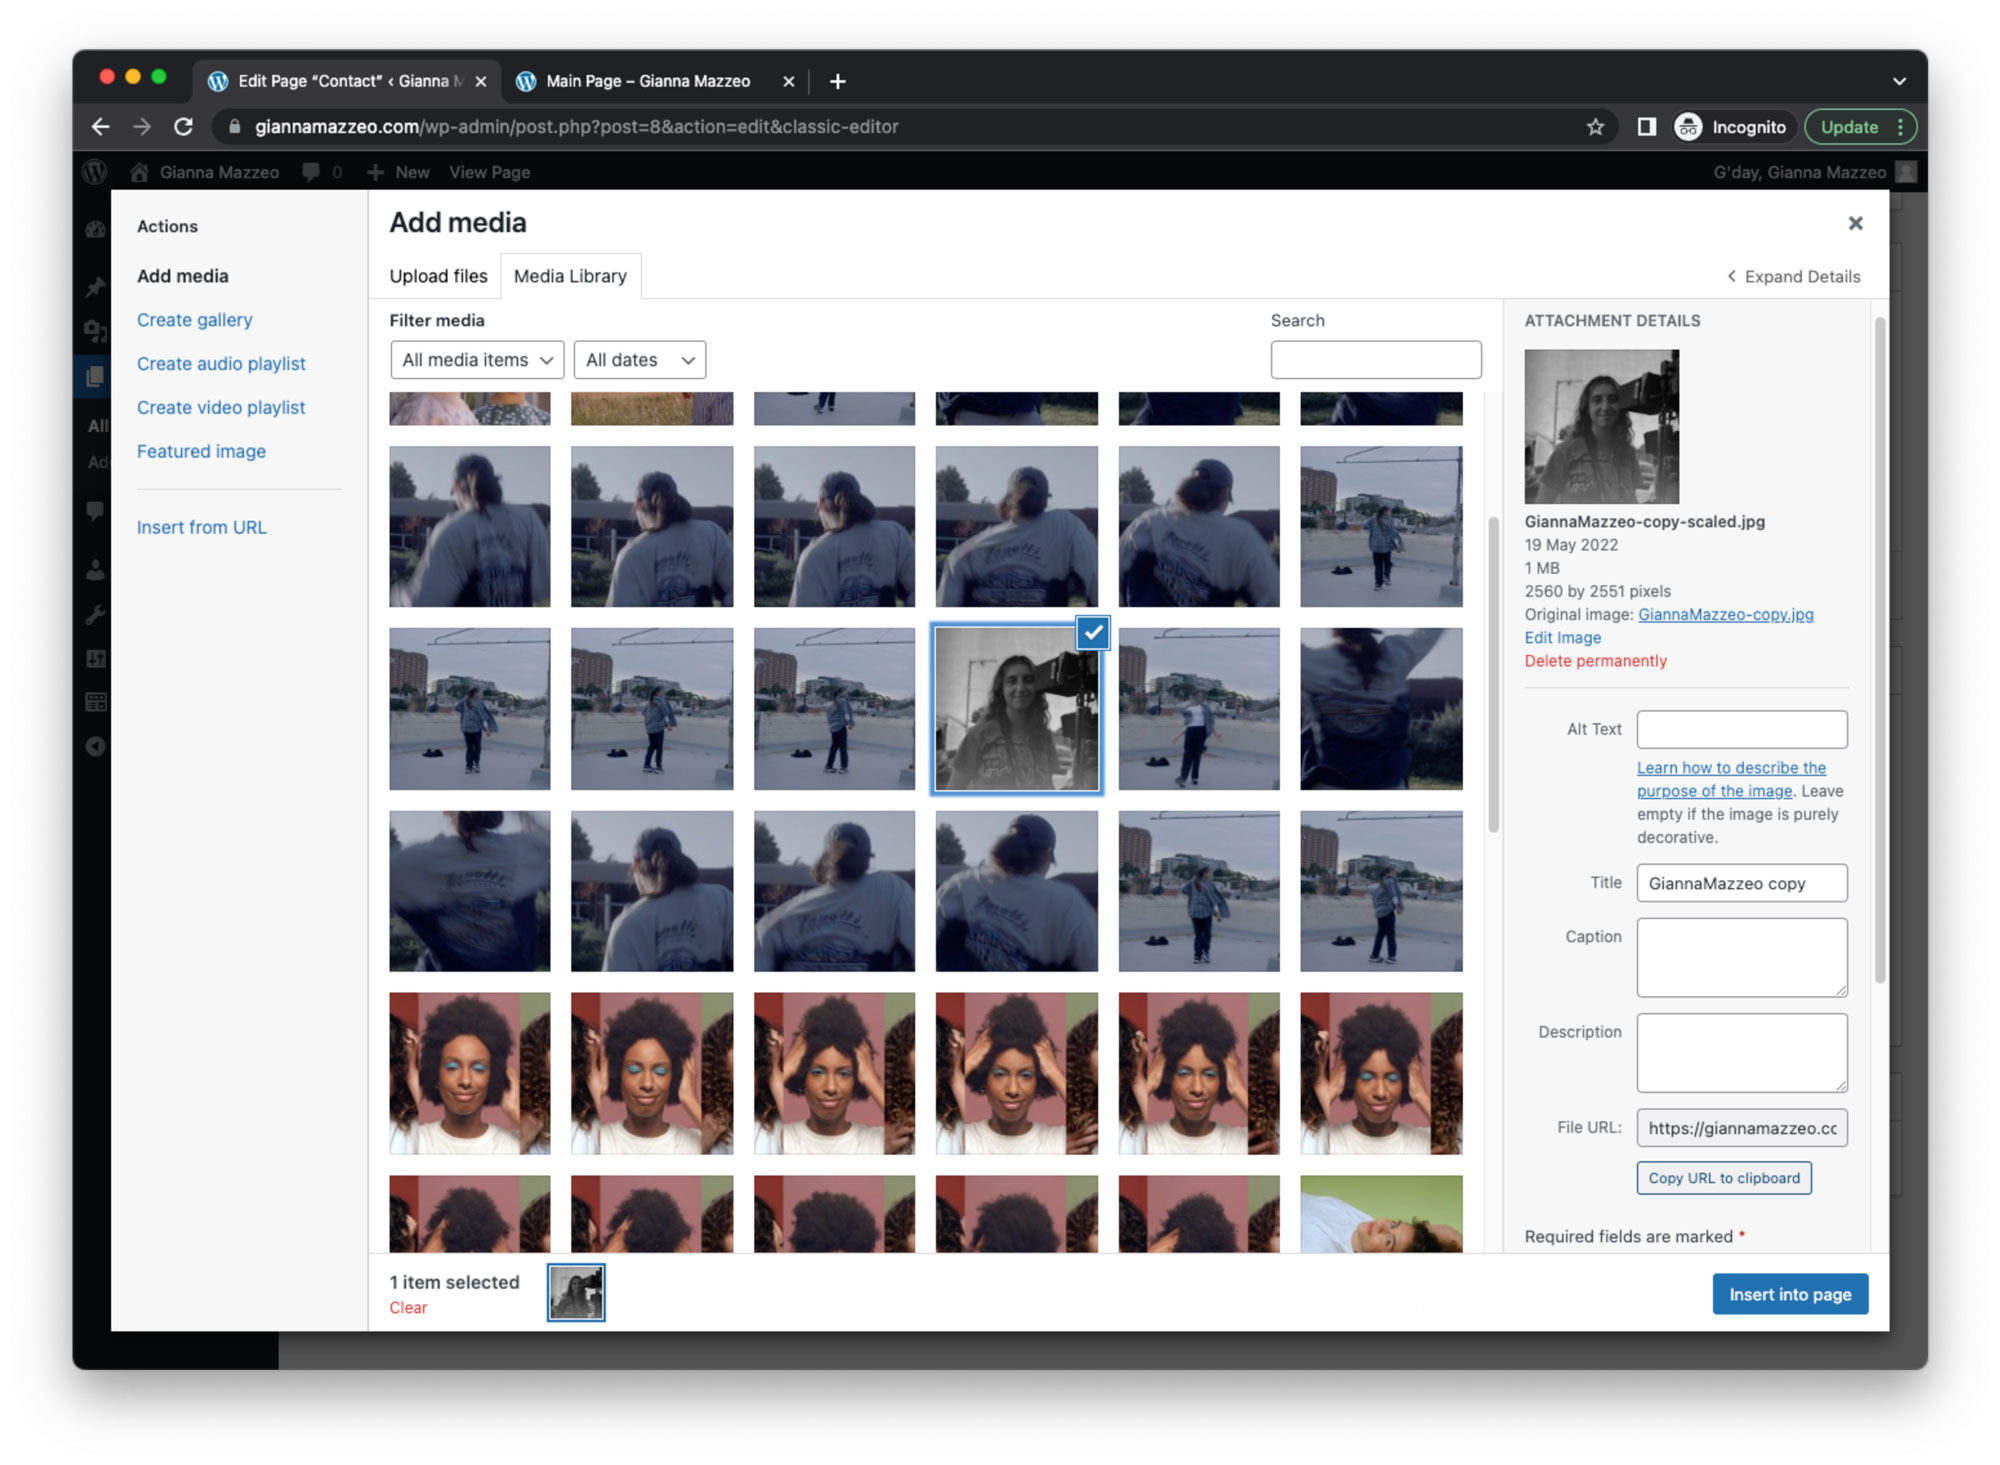
to add or change image, click add media > a window will open > you can drag and drop the image in here.
once its uploaded click on it, navigate to right hand side and find FILE URL. click copy URL
close the window, find the area circled, paste the url in between the quotation marks.
background and text colour picker – to change the colours in this page only
your contact details are wrapped in <strong> tags, this. is to ensure it to display in the same blue as your logo.
click update to save.
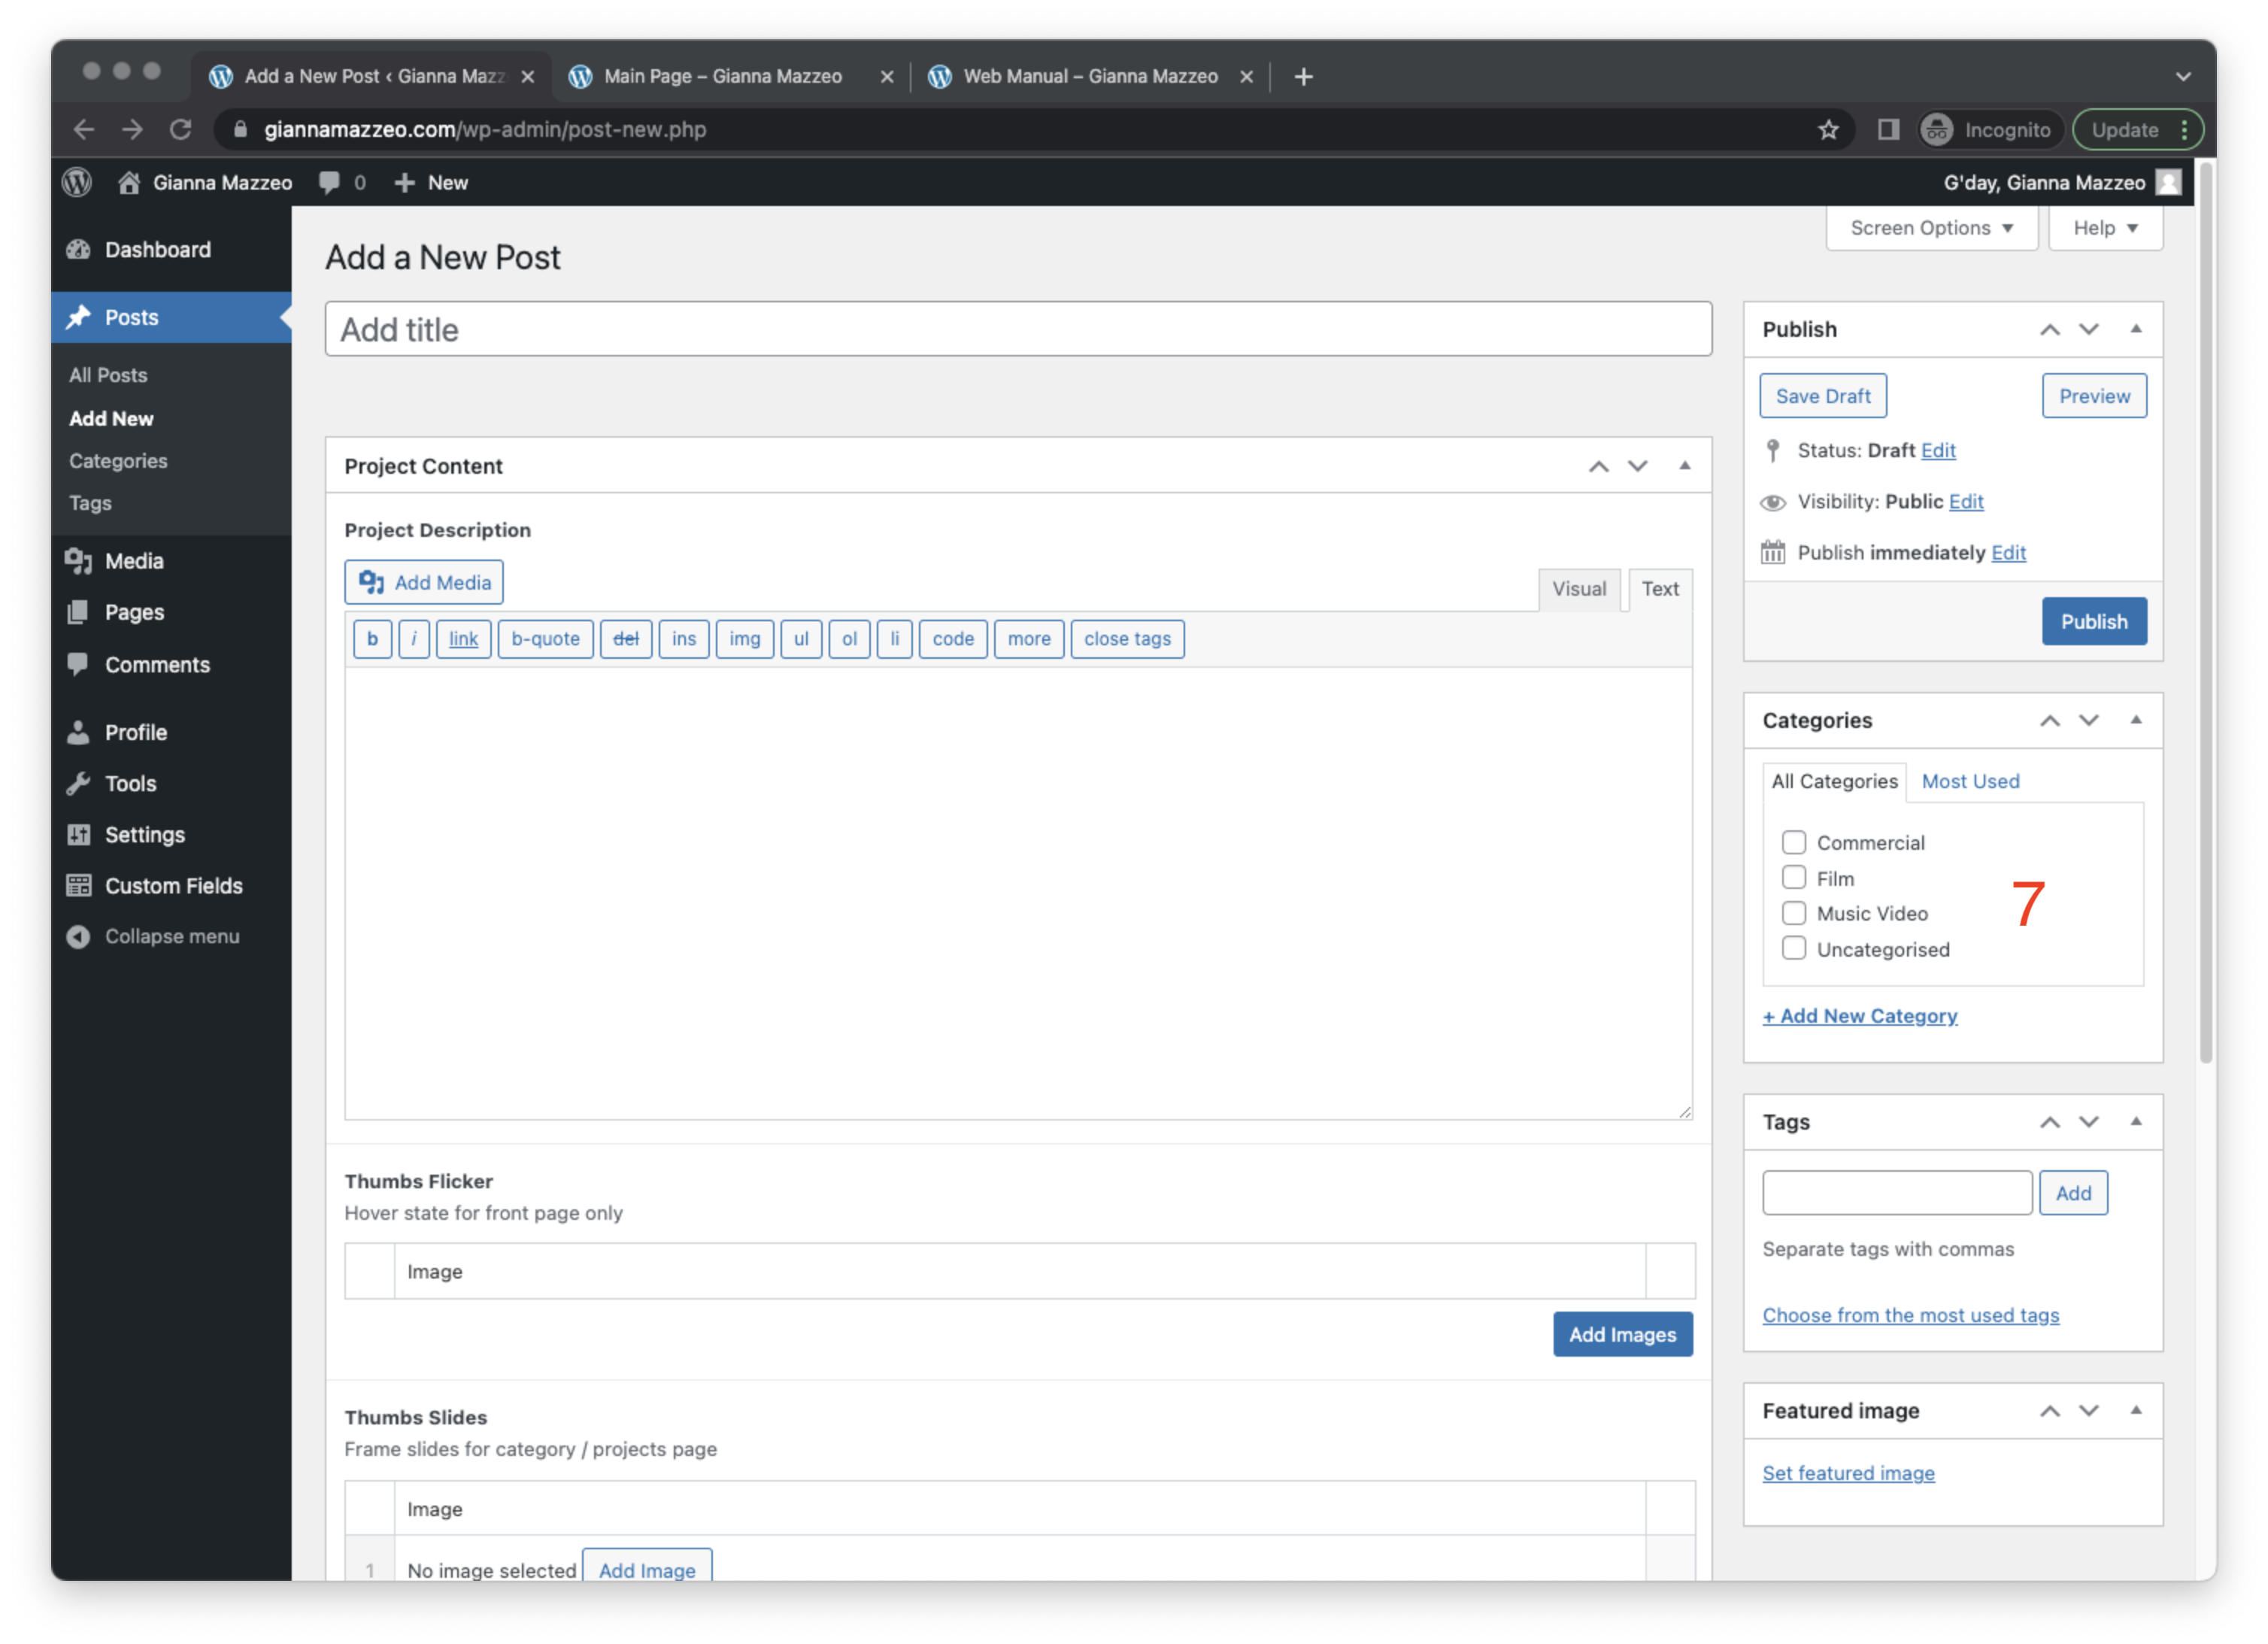
UPLOADING NEW PROJECT
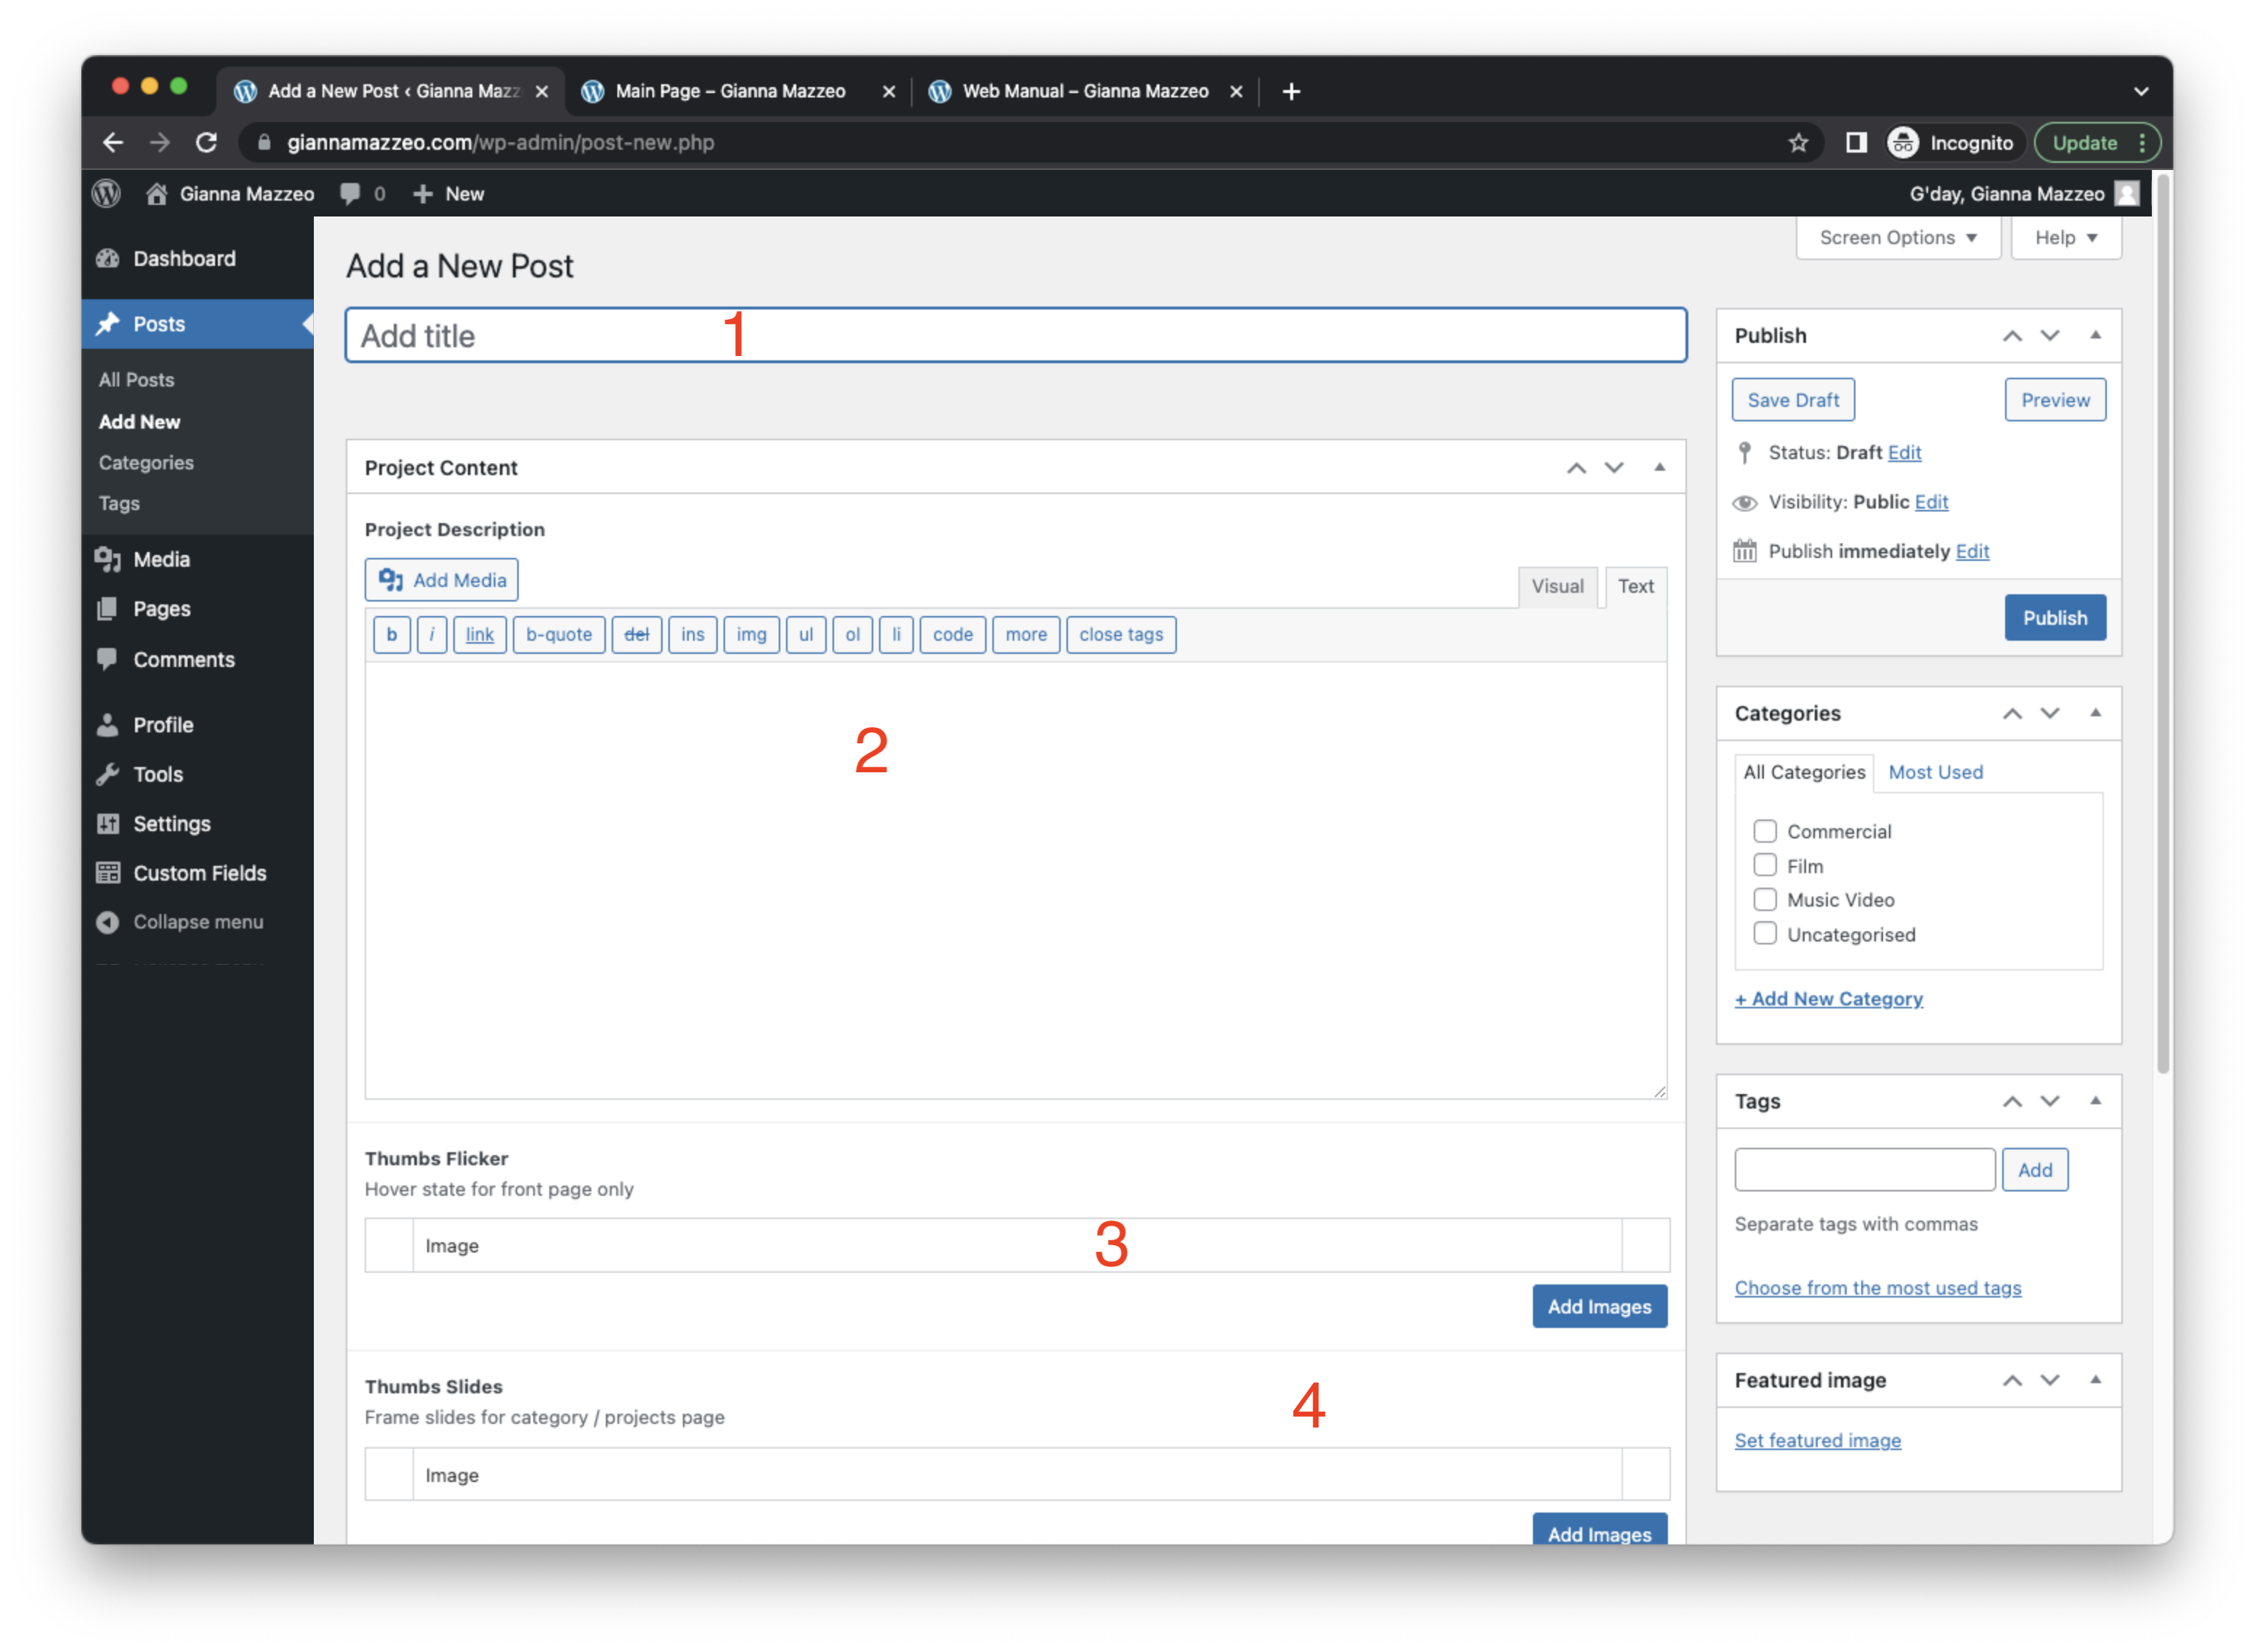
Navigate to Posts > Add New
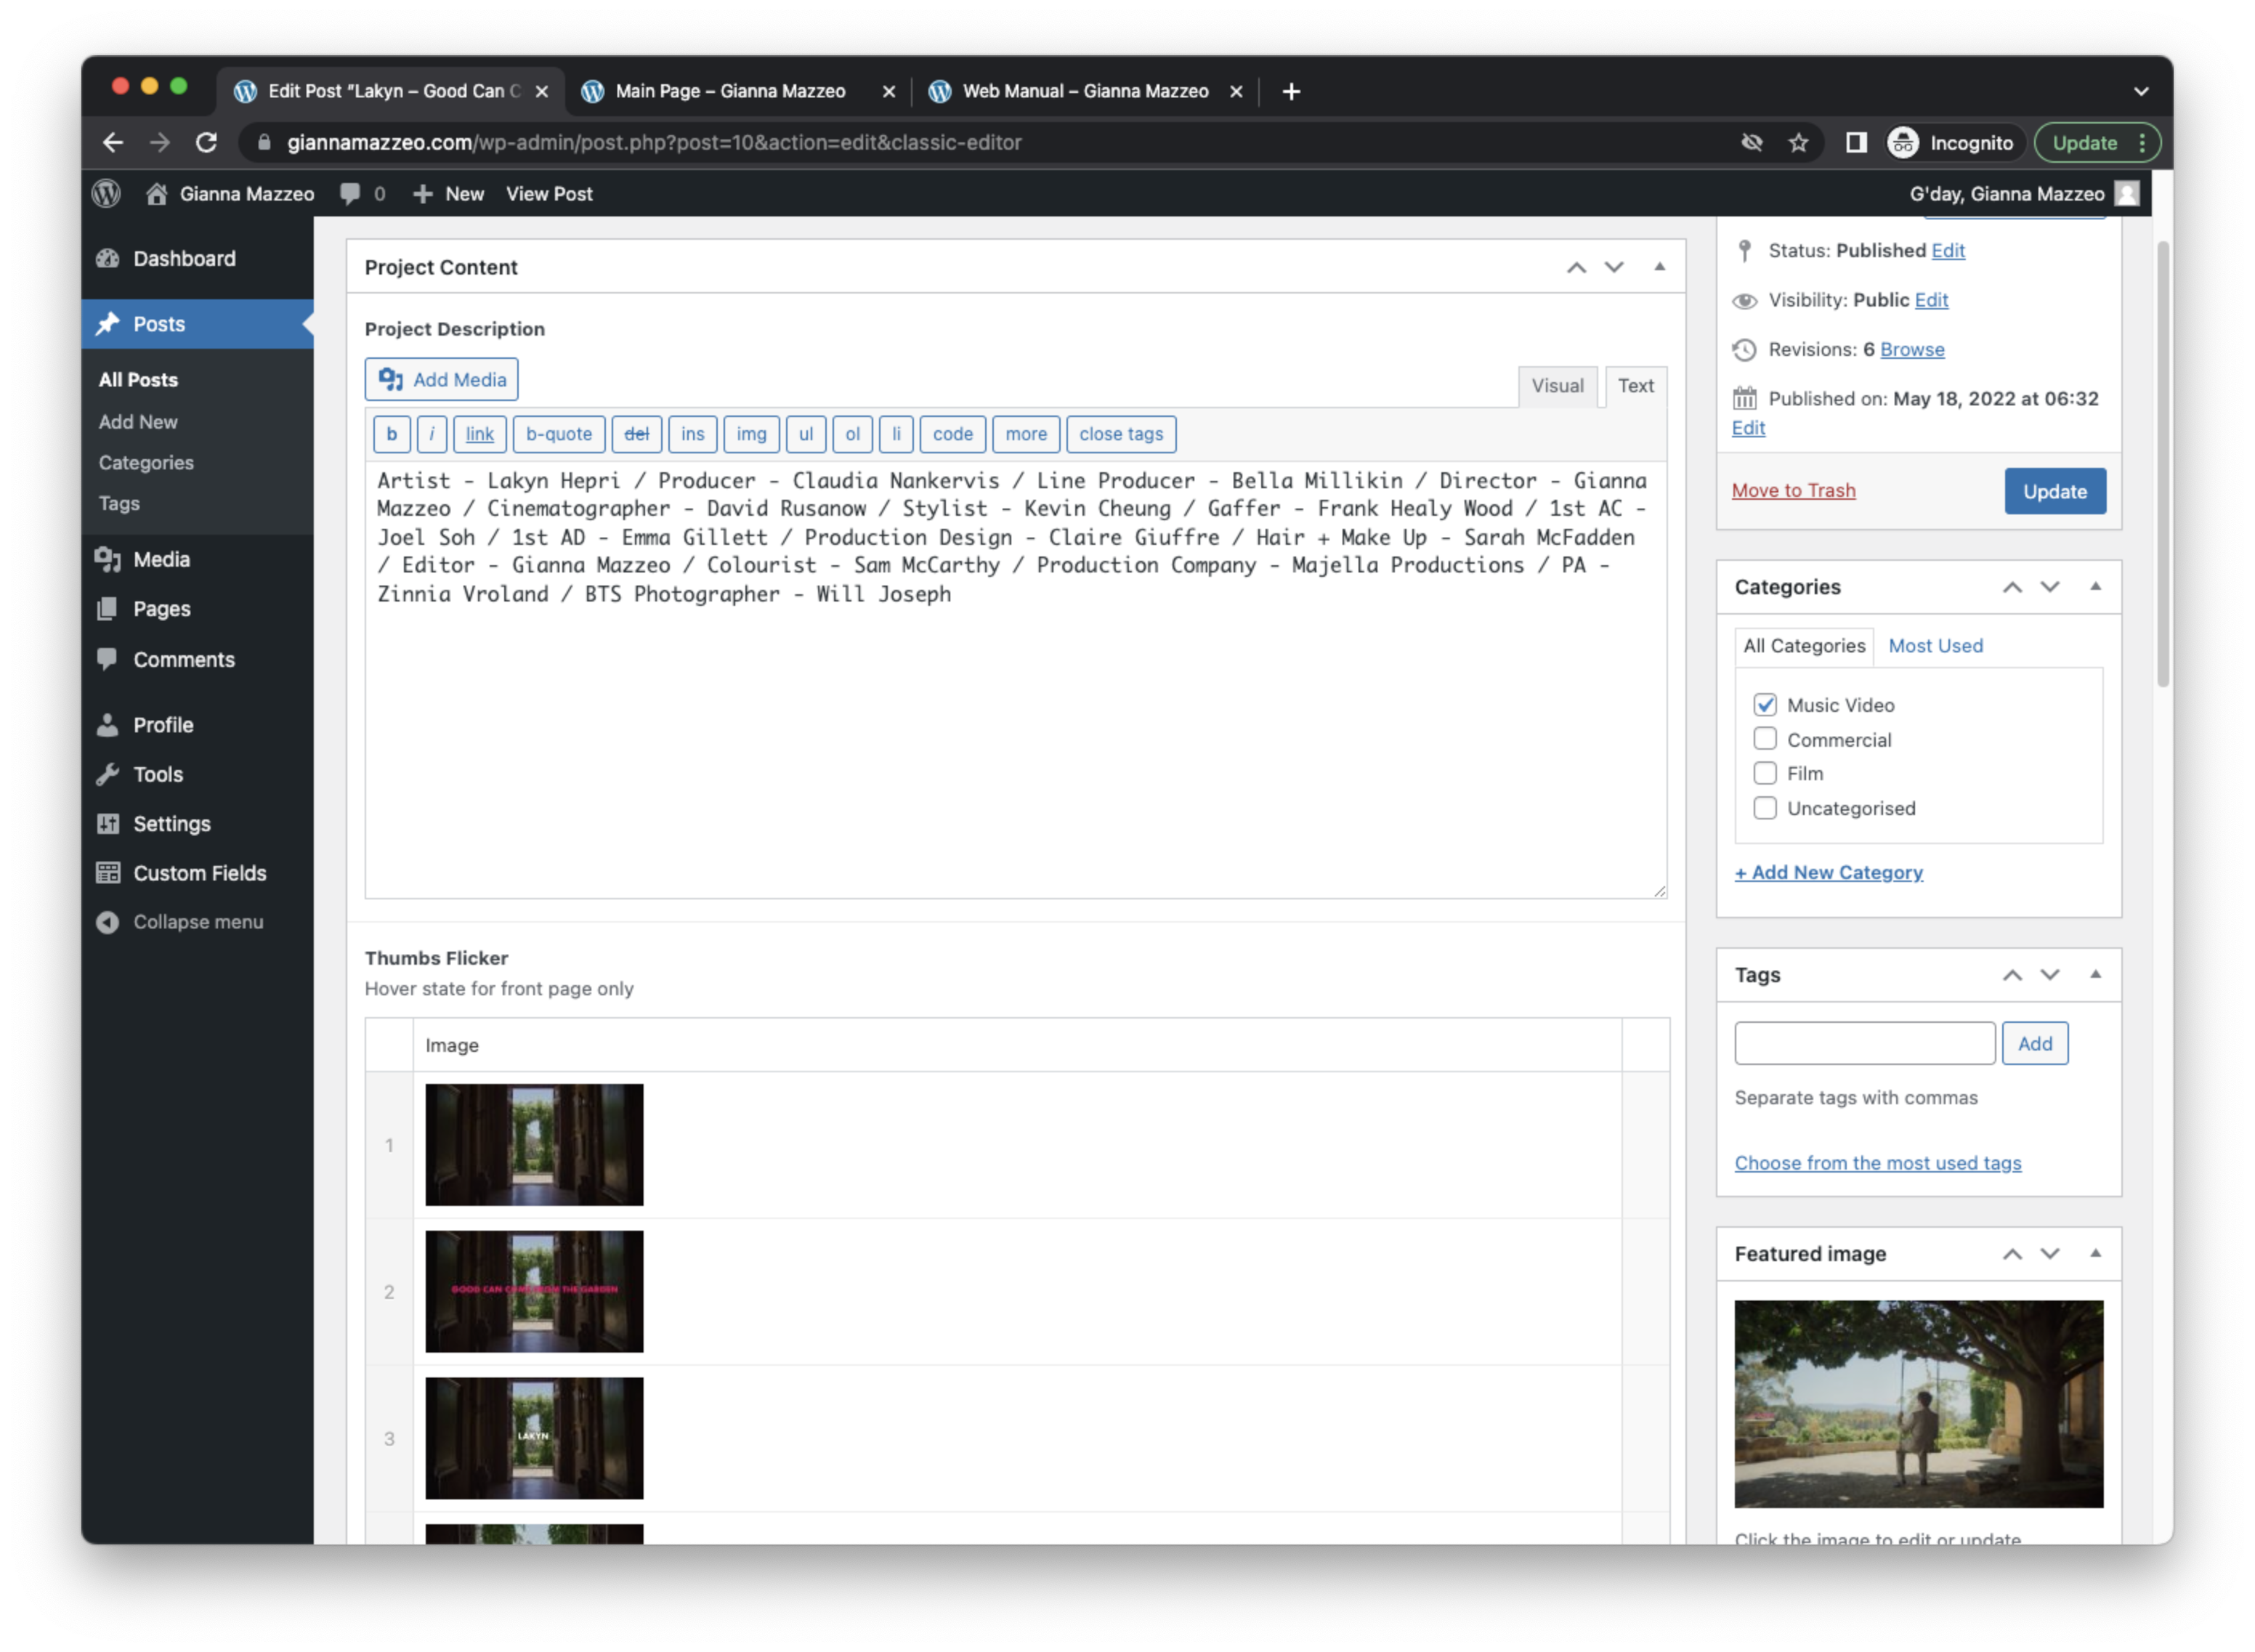
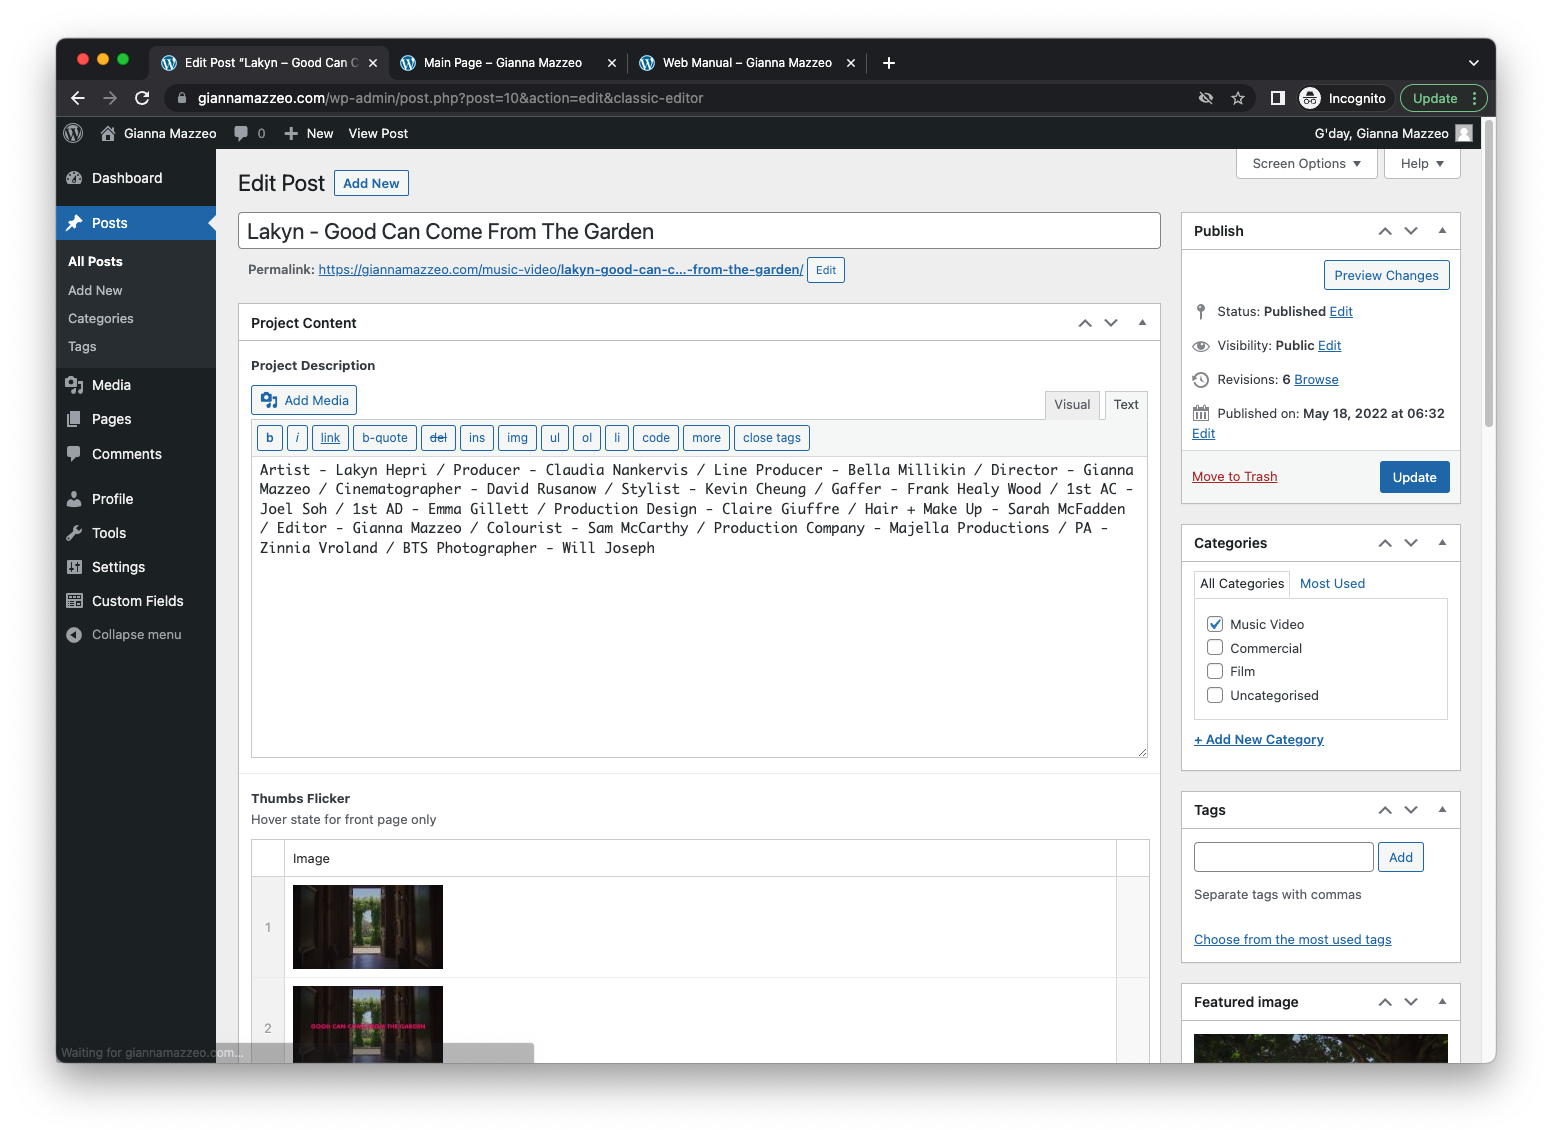
Enter the title of the project
enter the description if applicable
you can ignore this one – was for the old home page
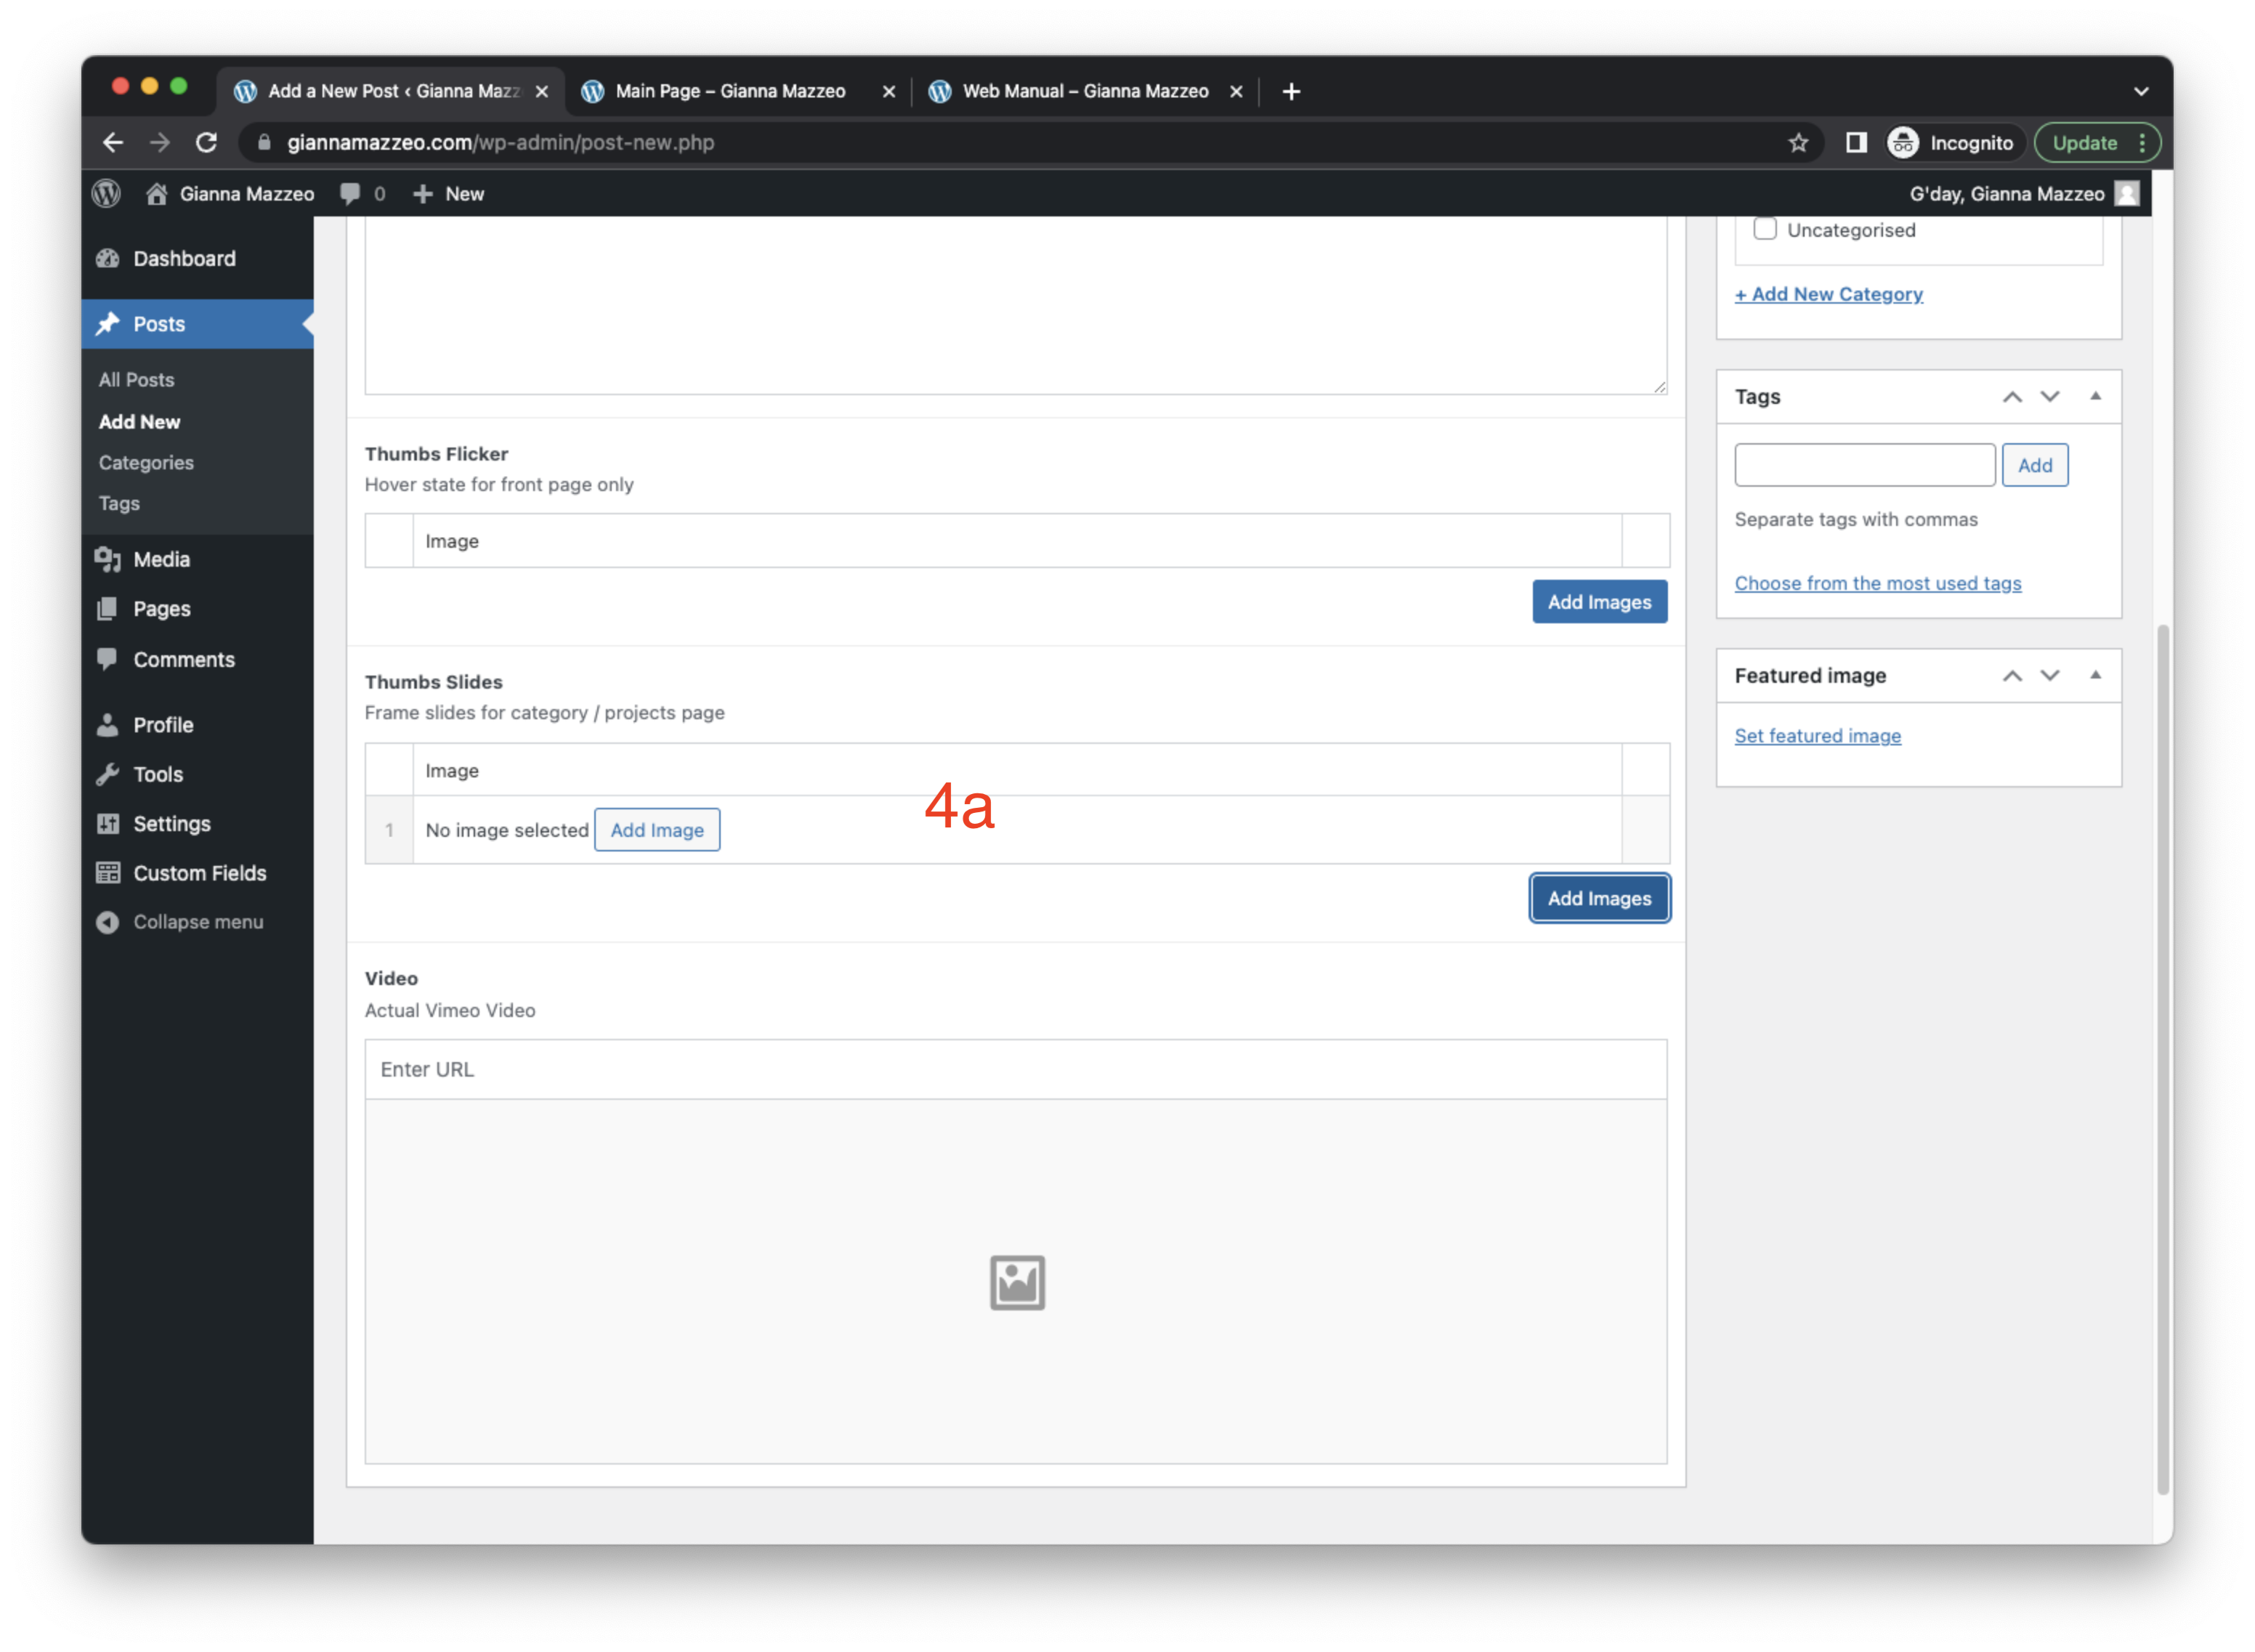
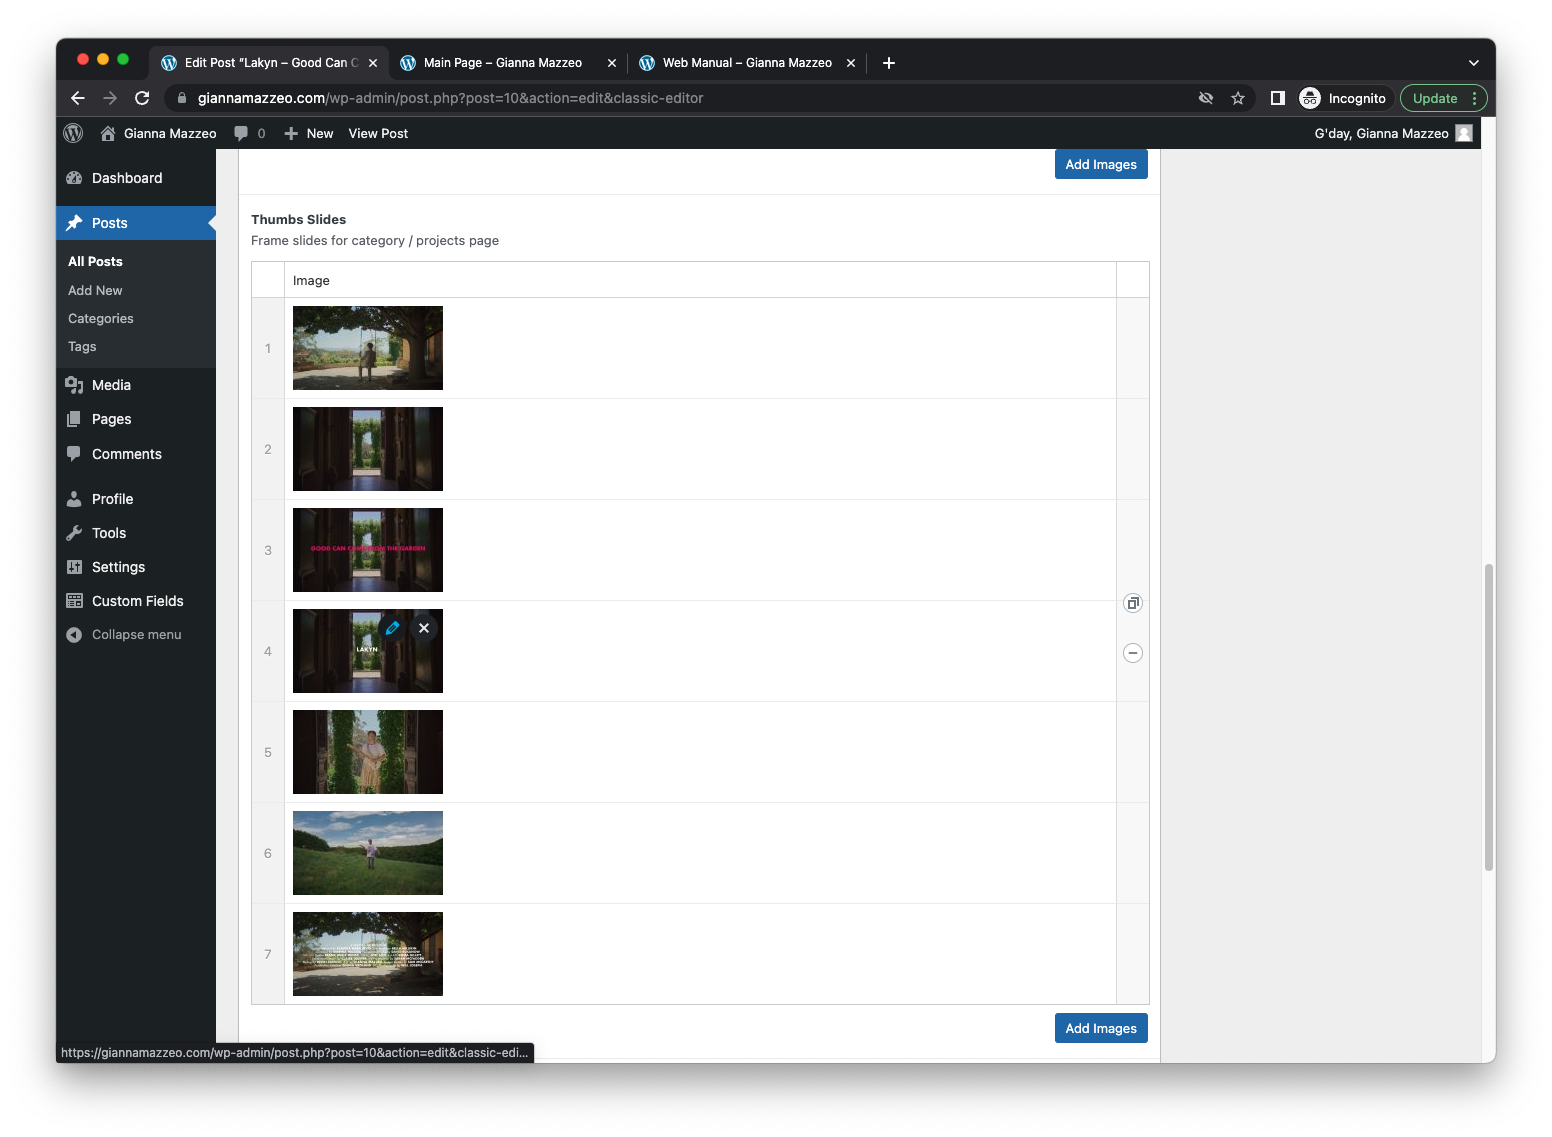
this is where you upload the gif, and images for the category page slides. click add images, a row will appear
4a – click Add image to open up the same window as in previous instruction. this time, drag and drop all the images you want to add. ensure they are all have tick on the right top corner, and click select. you can add multiple images in one go.
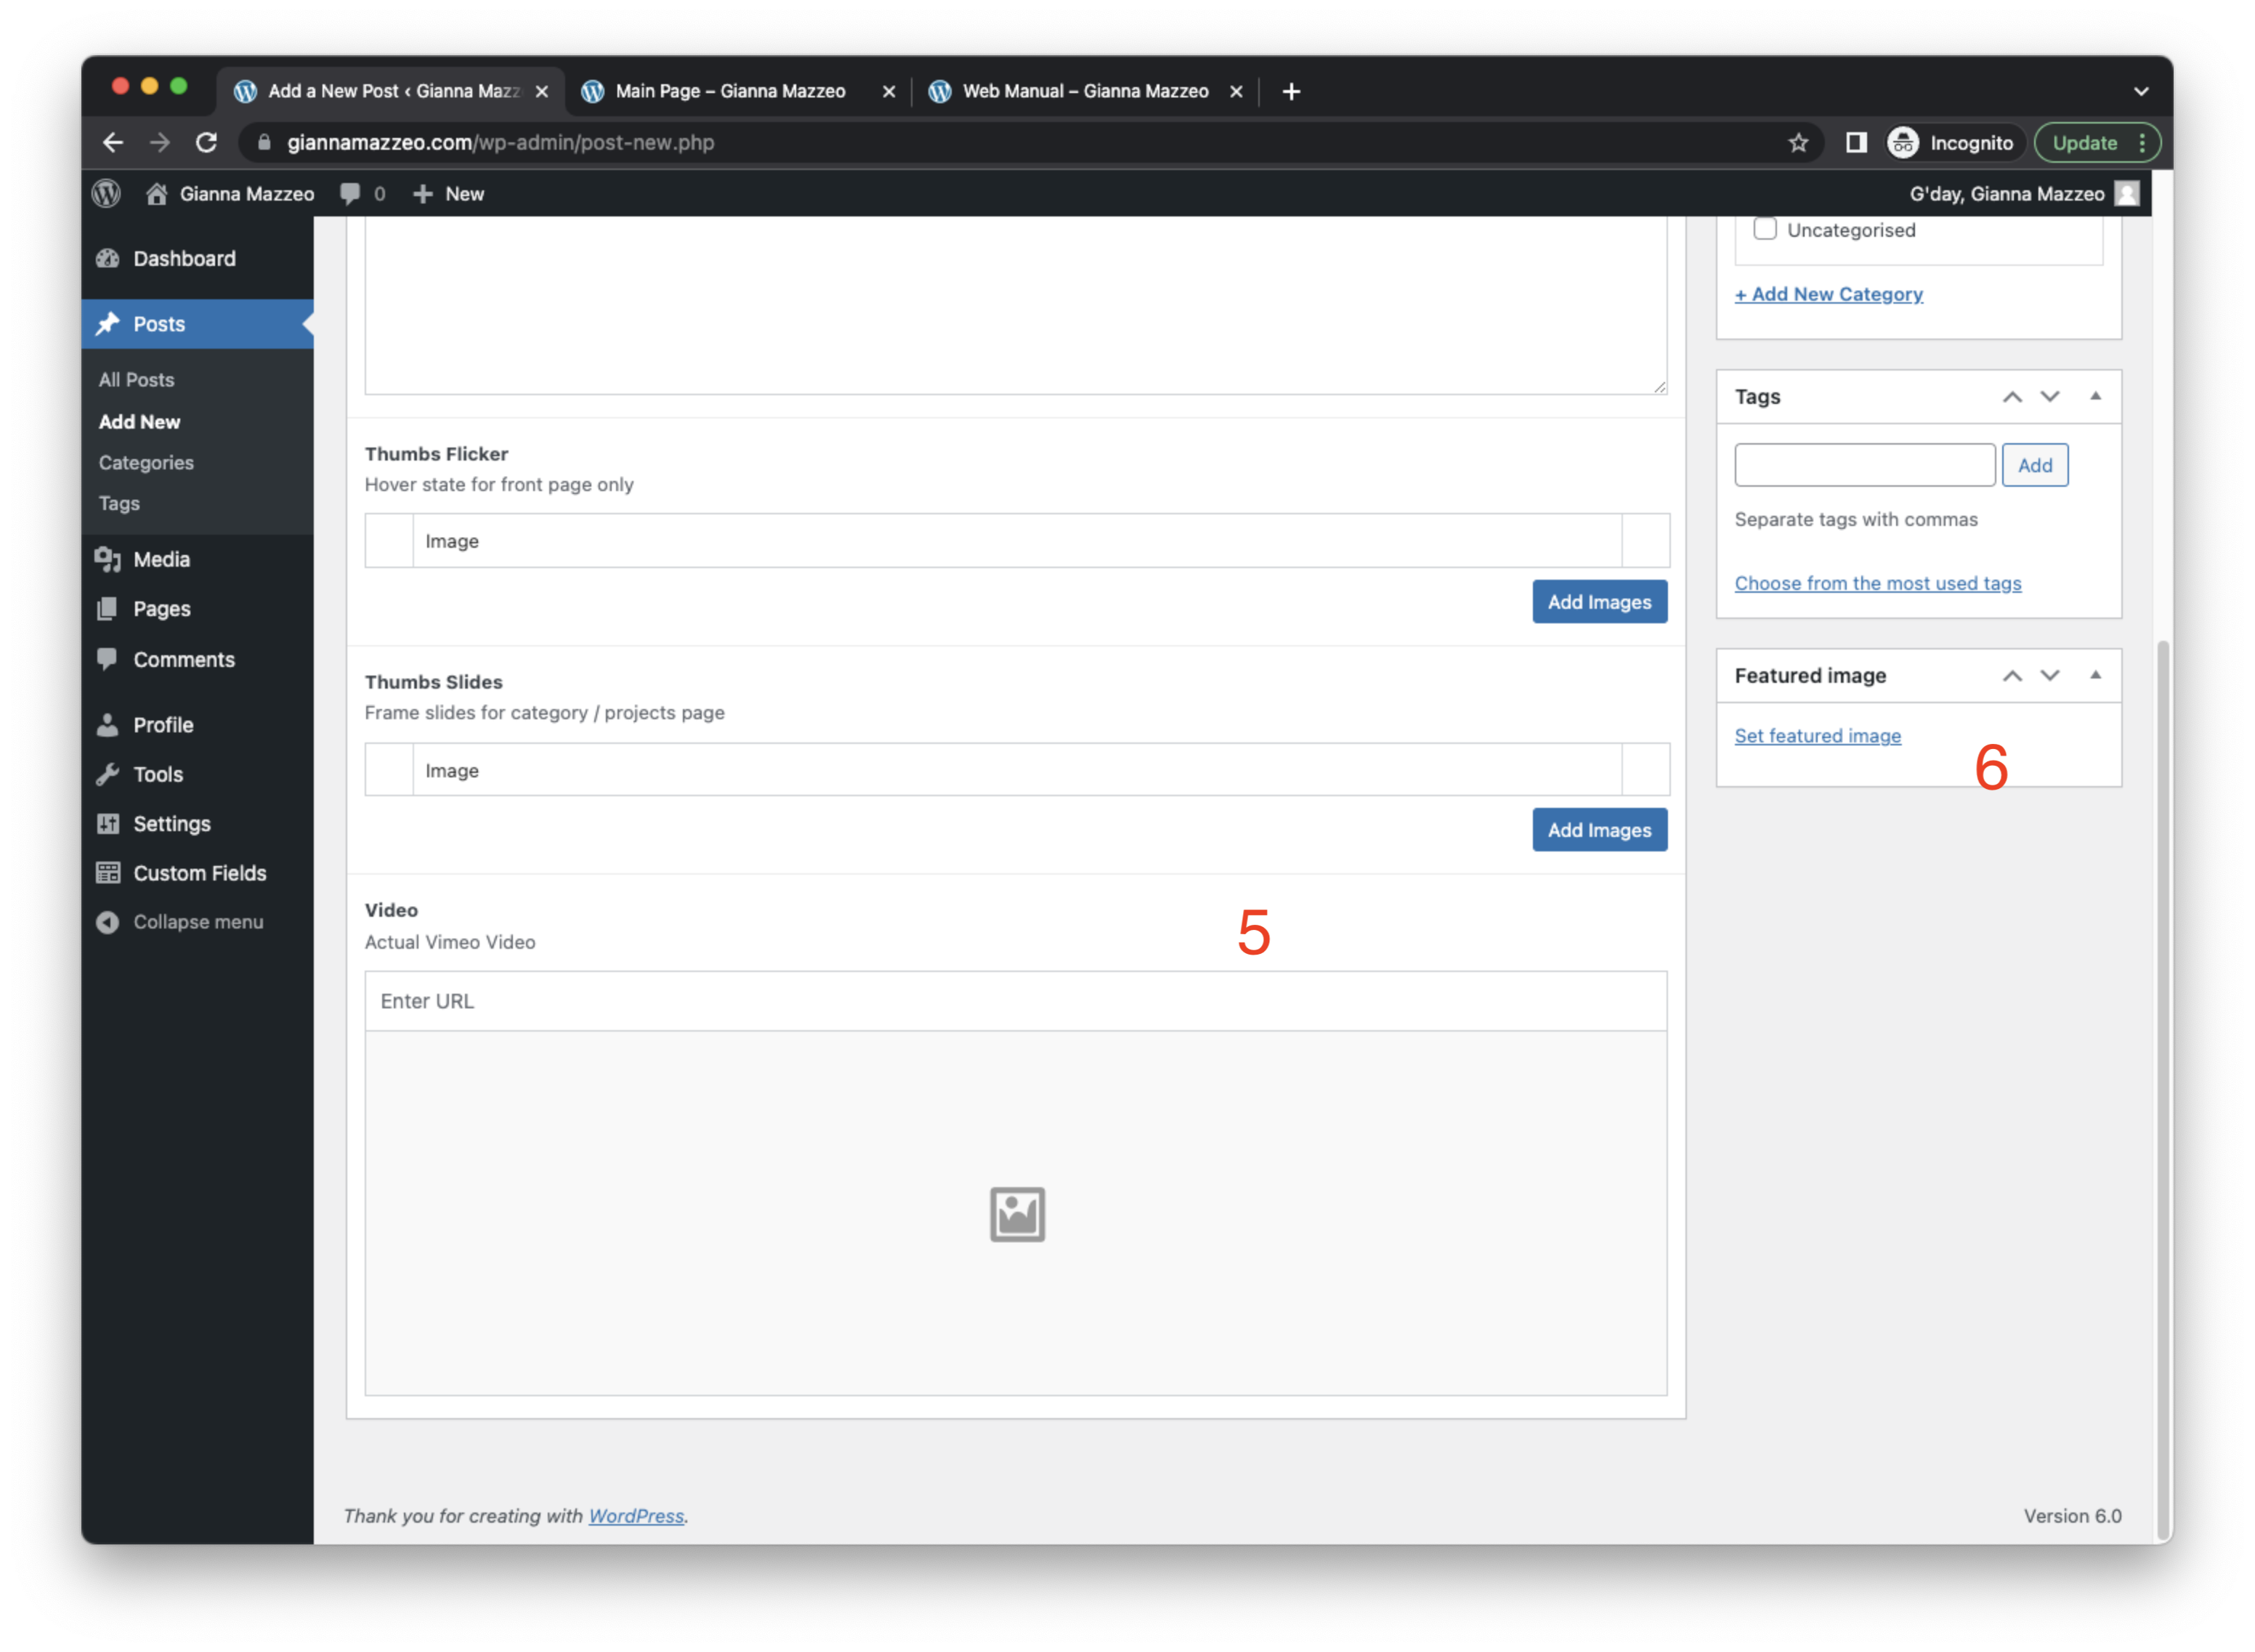
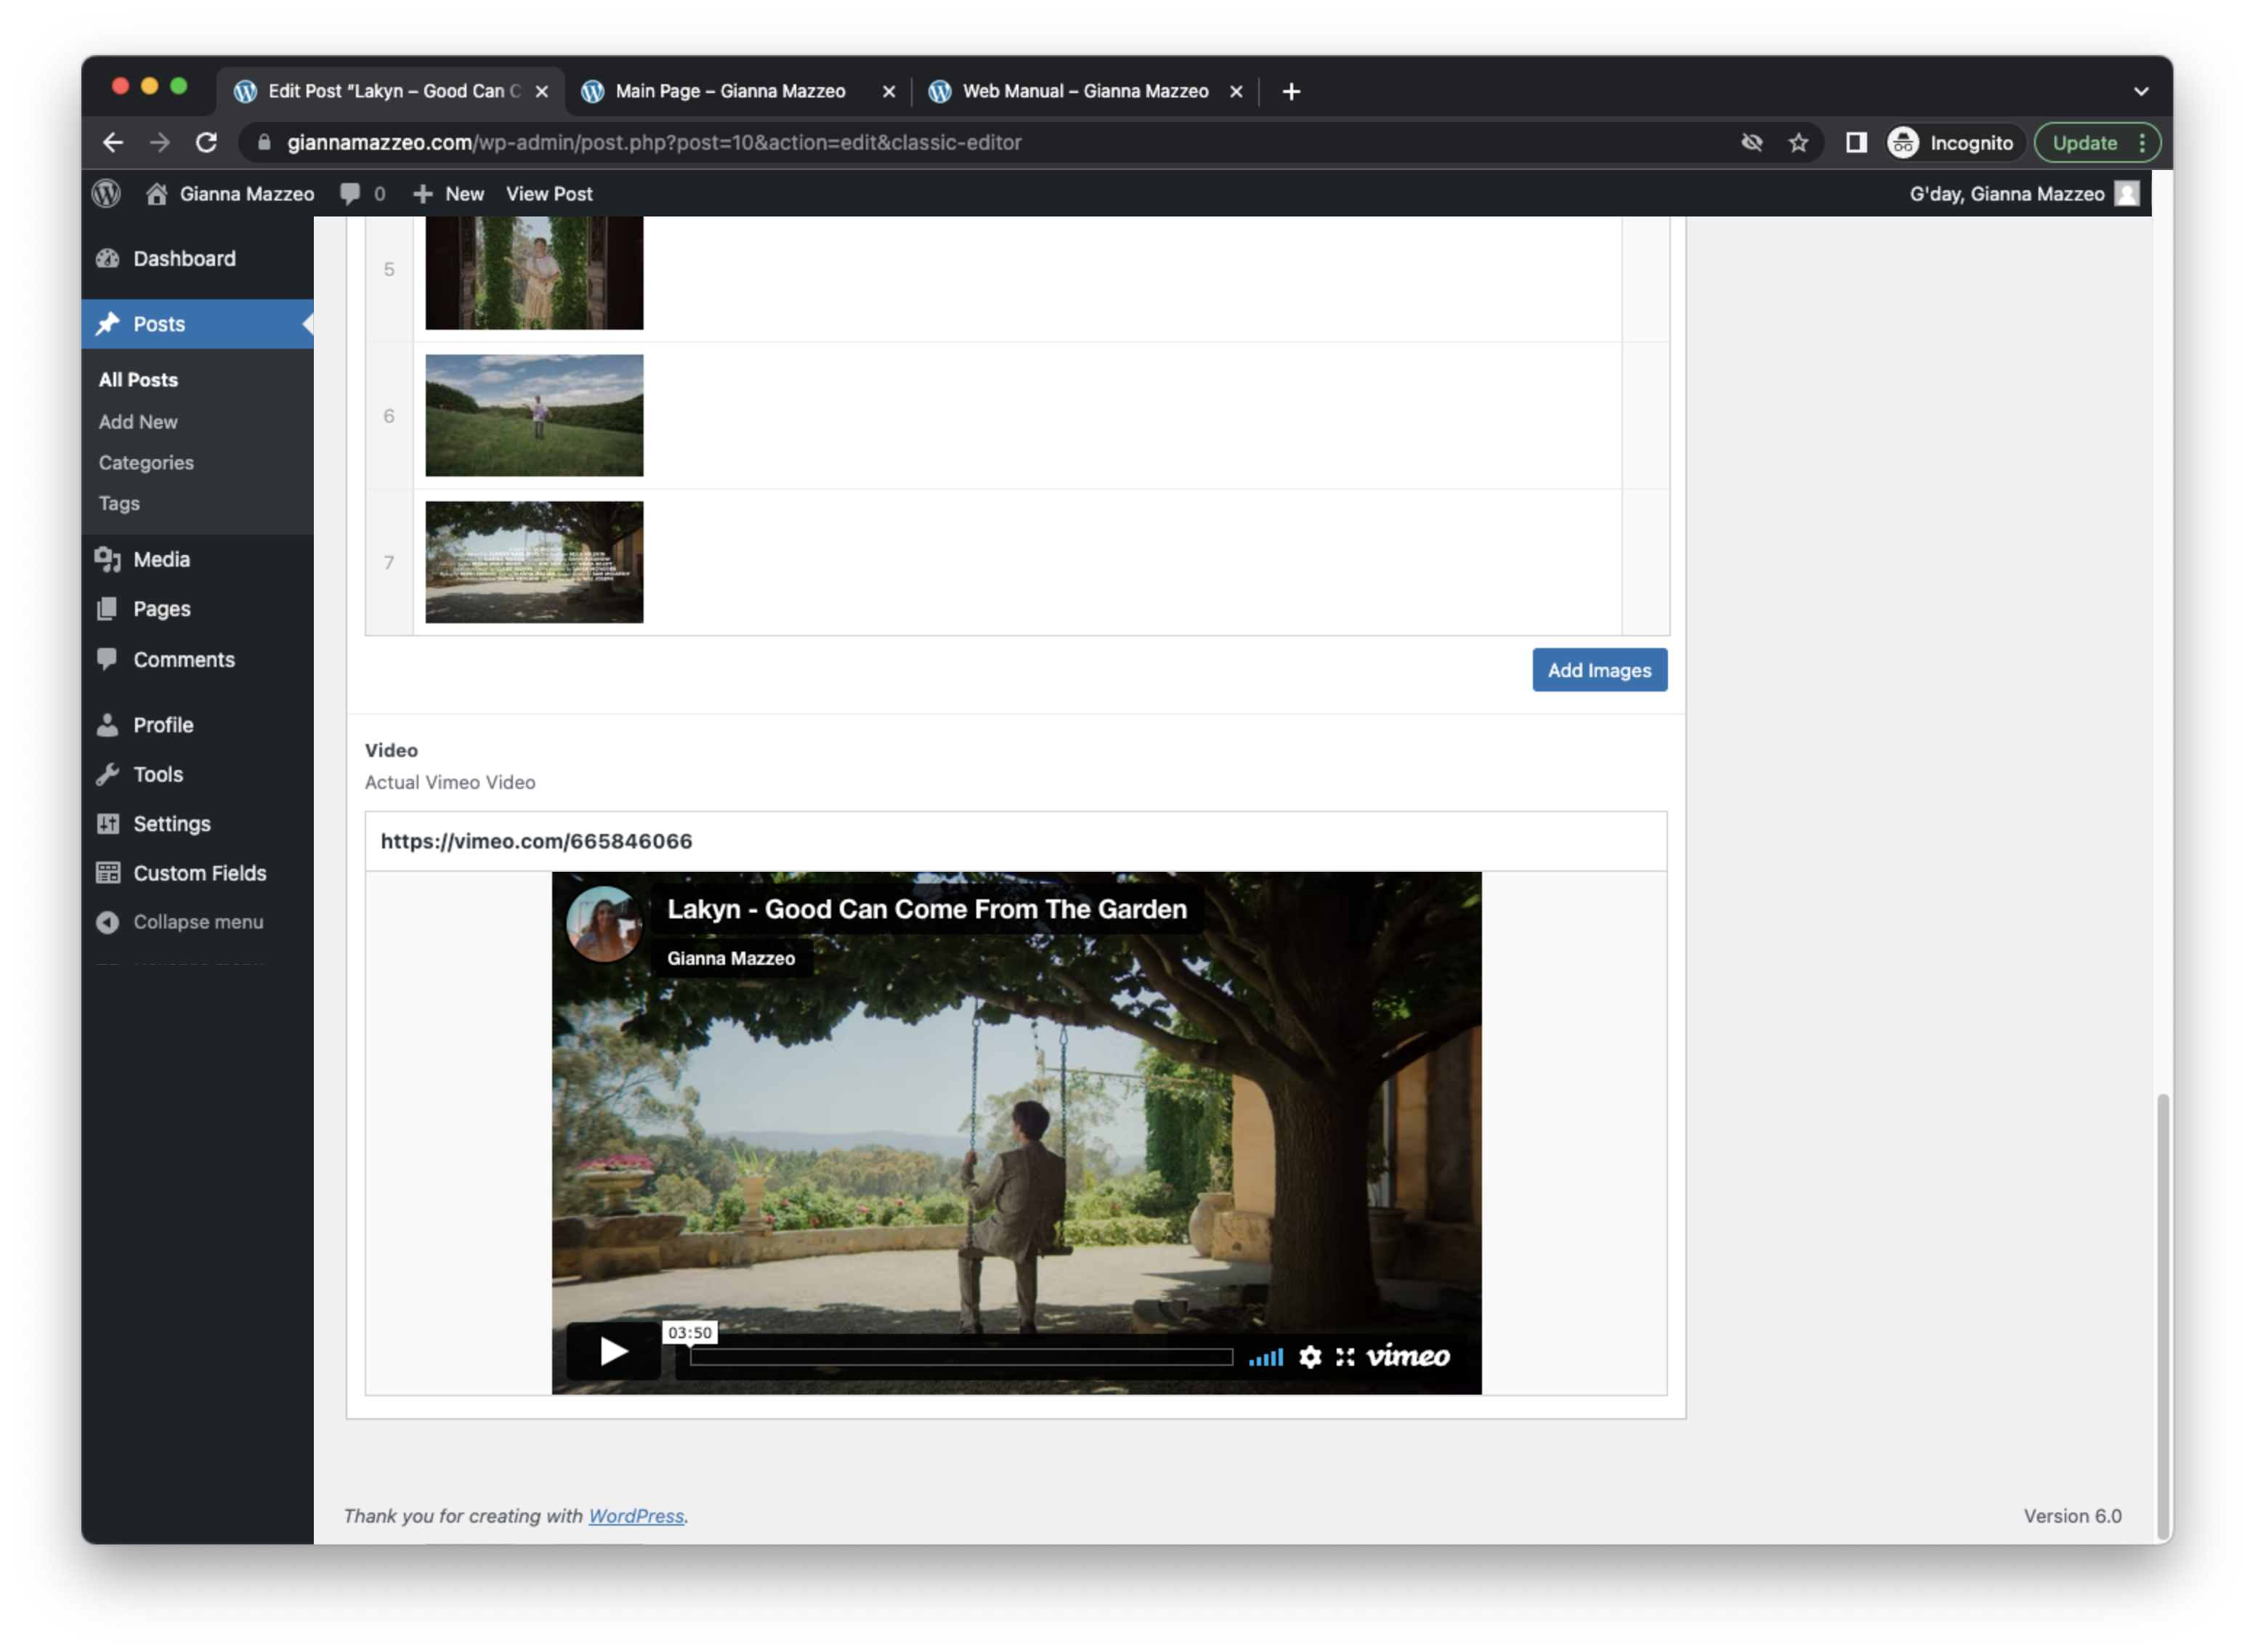
this is where you paste the vimeo link to the actual video
this is where you set the featured image, which will be displayed in the front page as you move your mouse around. the process is the same as 4a, but you can only choose 1 image. click set as featured image when the image is selected to apply it.
select the category where the project belong, to ensure it displays in the right page.
you can check other existing projects to view how it should look like.
once done, click PUBLISH (or update if updating existing one)
EXAMPLE OF COMPLETED PROJECT
you can update these existing contents by going into each of them and make the necessary changes, or completely remove them from the website by deleting them.